How to Install Anaconda for Python
Anaconda is a Python distribution with additional tools to make it easy to manage Python environments and packages. If you’re the kind of person that wants to work on a project without worrying about compatibility between dependencies or building open-source packages from source, then Anaconda will probably be a helpful tool for you. The downside to the Anaconda distribution is that it is quite a large distribution. It is also available for Linux, Mac, and Windows operating systems, which makes it easy to share code. Anaconda will take up 1-3 gigabytes of your system memory, depending on its exact specifications at the time you install.
This article will walk you through the steps to install Anaconda so you can get started working on your projects!
Download the Anaconda Installer
To start, go to anaconda.org and download the proper ‘Individual’ version for your operating system. The individual version of Anaconda is designed for anyone who will not use Anaconda as an enterprise (which is nearly everyone). The installer can be a little large (about 500 MB) so it may take a few minutes to download.
Install Anaconda
Once the installer for your operating system has been downloaded, run the installer. The install prompts may differ between operating systems. If you are unsure which option to select, it is best to go with the default, or recommended, setting. The steps below walk through installing Anaconda for Windows.
- Double-click the .exe file you downloaded from the anaconda.org website.
- Click ‘Next’ when the installation dialog opens to proceed with installation.
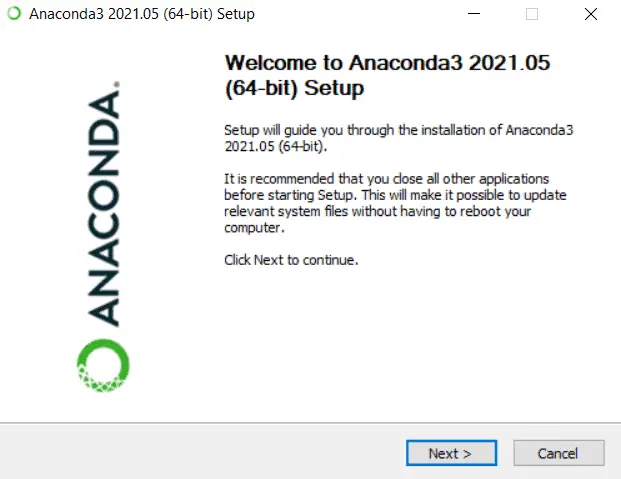
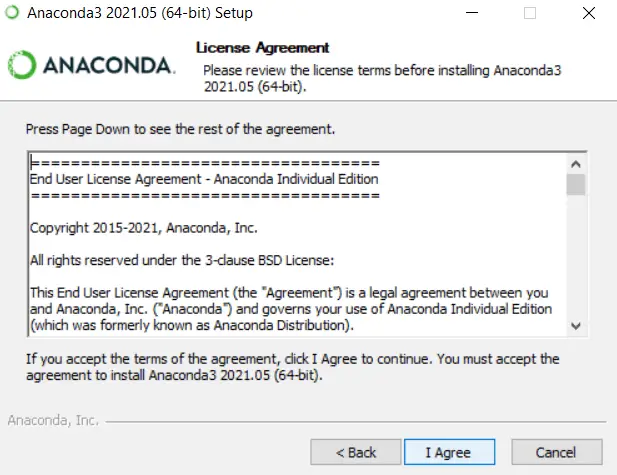
- Click ‘I Agree’ to accept the license agreement (it’s recommended you read this agreement).
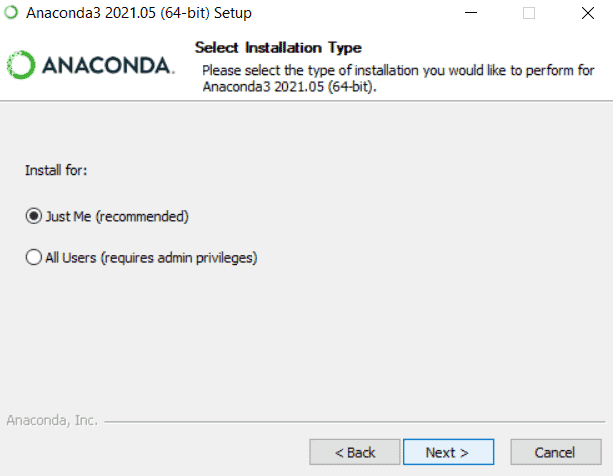
- Select ‘Just Me’ to install for your user profile.
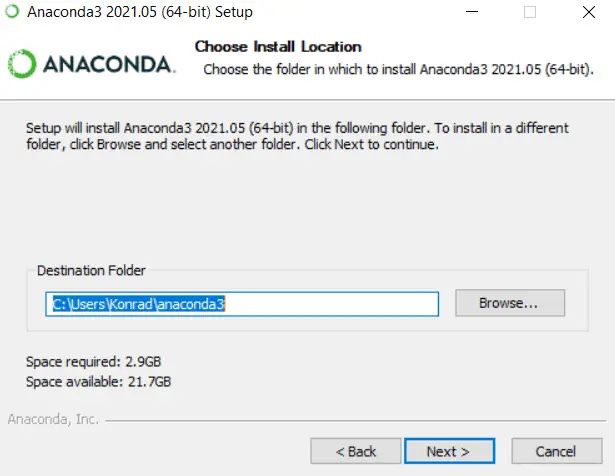
- Confirm the installation’s destination folder, or select a new installation folder, and click ‘Next’.
- If you use an IDE like Visual Studio Code or PyCharm it’s a good idea to check the box to ‘Register Anaconda3 as my default Python 3.x’.
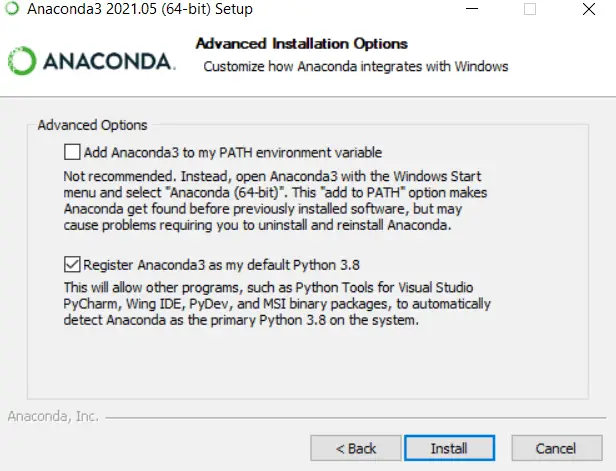
Note: If you get a warning message (like the one below) when you check this box it means you have already set a default Python and you will need to decide if you want to keep the default or make your Anaconda install the default.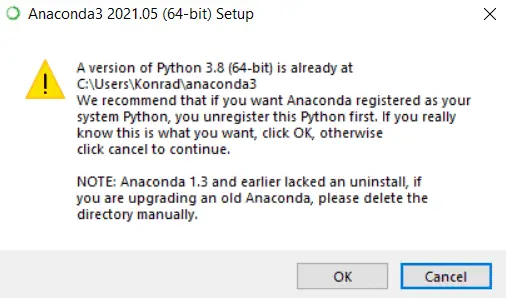
- Click ‘Install’. It will take several minutes for the Anaconda installation to finish.
- Click ‘Finish’ to complete the Anaconda installation.
Open the Anaconda Prompt
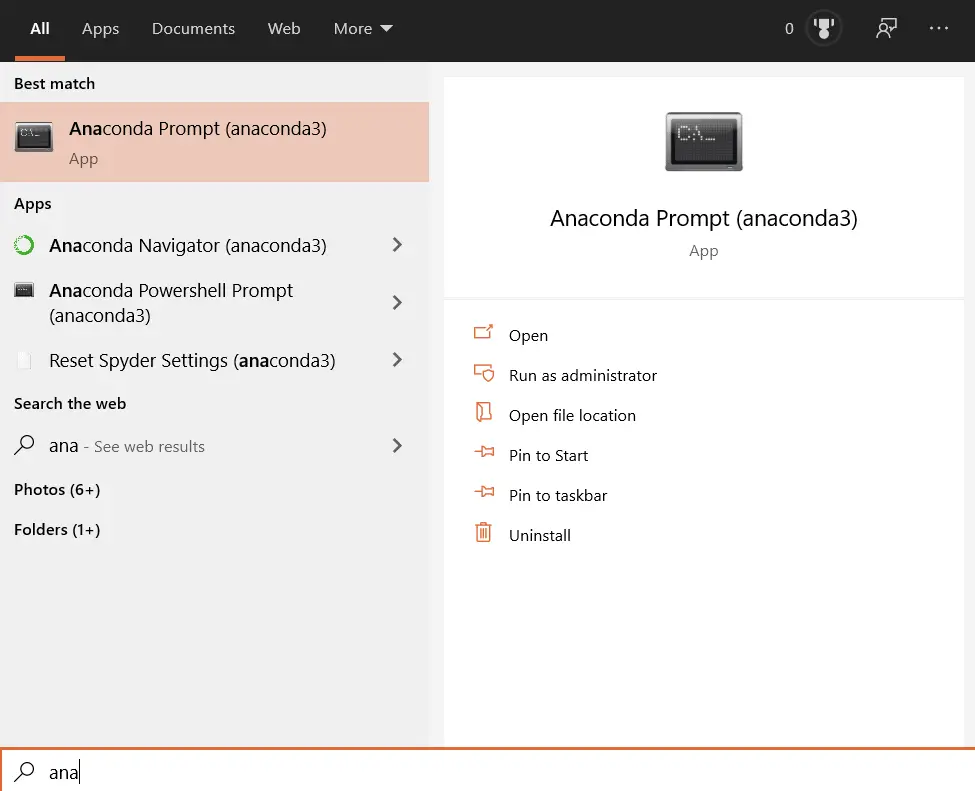
I find it easiest to use Anaconda with the Anaconda Prompt. To access the prompt on Windows, open the Windows start menu and start typing ‘Anaconda Prompt’. Then, select the Anaconda Prompt program to open the Anaconda terminal. The Anaconda prompt behaves nearly identically to the Windows terminal (AKA cmd, command line, etc.) but it’s configured to have access to all of Anaconda’s added tools.
Create a New Python Environment
On the left side of the current line in the Anaconda Prompt you will notice the (base) indicator. This tells you that you are currently using the base Anaconda environment. This is okay, but it is recommended to create a new environment for most of your work. This is easy to do simply type the following command to create a new Anaconda environment and replace ‘myname’ with the name of your environment and ‘3.9’ with your desired Python version.
conda create -n myname python=3.9
Then follow the prompts to complete environment creation.
After your environment is created you’ll need to activate it. Simply enter the following command, replacing ‘myname’ with the name of your environment.
conda activate myname
Now you will see (myname) on the left side of each line the prompt, which indicates that myname is the active environment. Visit the Anaconda documentation for more information on managing environments.
Conclusion
That’s it. You should now have Anaconda set up and be ready to install packages to your new environment so you can start creating something useful and amazing!
Whether you’re looking to take your GIS skills to the next level, or just getting started with GIS, we have a course for you! We’re constantly creating and curating more courses to help you improve your geospatial skills.
All of our courses are taught by industry professionals and include step-by-step video instruction so you don’t get lost in YouTube videos and blog posts, downloadable data so you can reproduce everything the instructor does, and code you can copy so you can avoid repetitive typing
