OpenLayers Introduction: Web Maps for Beginners
Learn to build a simple web map with the OpenLayers JavaScript library. This tutorial will follow the OpenLayers Quick Start guide, with a few additions, to get you started building web maps. By the end of this tutorial you will know how to complete the following three tasks.
- Display a basic web map on a web page
- Set the default location and zoom for the map
- Choose between two different base maps to display.
First Web Map
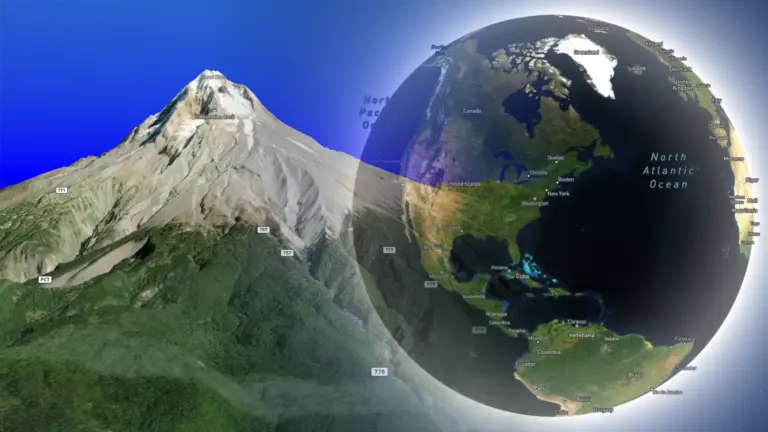
Here is the first web map we will create. It is a simple map that displays only a base layer. The web map is centered on the African coast. First, we will build the web map, then change the map center and zoom level. This section will build the code out line-by-line. The full code block is available at the end of the section.
My Map
Create the HTML Document
Create a blank html document. You can use an IDE (like Visual Studio Code) or any text editor. To start, we’ll include head and body tags.
<!doctype html>
<html lang="en">
  <head>
  </head>
  <body>
  </body>
</html>
Add Scripts and Style to the HTML Head
Now add four elements to the head tag. These elements will specify the CSS (style information) for OpenLayers (link tag), the CSS for the container that contains our map (style tag), the OpenLayers library (script tag), and the title. Note that including the URL to OpenLayers is not recommended for production or distribution, we’ll cover setting up an actual project in a future post. However, it is a good way to demonstrate how to get started. URLs for the CSS and JavaScript files are available from the OpenLayers download page. Within the style tag we set up a class (container) for our map, and specify that it will be 400 pixels tall and the full width of the element. The title tag specifies the title of the webpage.
<!doctype html>
<html lang="en">
  <head>
    <link rel="stylesheet" href="https://cdn.jsdelivr.net/gh/openlayers/openlayers.github.io@master/en/v6.4.3/css/ol.css" type="text/css">
    <style>
      .map {
        height: 400px;
        width: 100%;
      }
    </style>
    <script src="https://cdn.jsdelivr.net/gh/openlayers/openlayers.github.io@master/en/v6.4.3/build/ol.js"></script>
    <title>OpenLayers example</title>
  </head>
  <body>
  </body>
</html>
Give Your Map a Title
Next, add a heading to put a title over the map and specify where the map should go. The heading is created with a h2 tag and the map container with a div tag that has class map. Add these items in the body section of the HTML document
<!doctype html>
<html lang="en">
  <head>
    <link rel="stylesheet" href="https://cdn.jsdelivr.net/gh/openlayers/openlayers.github.io@master/en/v6.4.3/css/ol.css" type="text/css">
    <style>
      .map {
        height: 400px;
        width: 100%;
      }
    </style>
    <script src="https://cdn.jsdelivr.net/gh/openlayers/openlayers.github.io@master/en/v6.4.3/build/ol.js"></script>
    <title>OpenLayers example</title>
  </head>
  <body>
    <h2>My Map</h2>
    <div id="map" class="map"></div>
  </body>
</html>
Write the Web Map Code
Time to add the OpenLayers JavaScript code to set up the map. To start, create a script tag and specify the type as text/javascript. Inside the script tag write the code to create the map. Create a variable for the OpenLayers map. Then add a layer to the map. The layer is the actual geographic data that will be displayed on the map. Nothing will show in your web map if you don’t add a layer. In this example we’re using open street map.
Now create a view. An open layers view defines which part of the map will be shown. Create a view the simply specifies the center of the ma and the zoom level. The larger the zoom level the more zoomed-in the map will be.
That’s all! You’re map is now ready!
<!doctype html>
<html lang="en">
  <head>
    <link rel="stylesheet" href="https://cdn.jsdelivr.net/gh/openlayers/openlayers.github.io@master/en/v6.4.3/css/ol.css" type="text/css">
    <style>
      .map {
        height: 400px;
        width: 100%;
      }
    </style>
    <script src="https://cdn.jsdelivr.net/gh/openlayers/openlayers.github.io@master/en/v6.4.3/build/ol.js"></script>
    <title>OpenLayers example</title>
  </head>
  <body>
    <h2>My Map</h2>
    <div id="map" class="map"></div>
    <script type="text/javascript">
      var map = new ol.Map({
        target: 'map',
        layers: [
          new ol.layer.Tile({
            source: new ol.source.OSM()
          })
        ],
        view: new ol.View({
          center: ol.proj.fromLonLat([37.41, 8.82]),
          zoom: 4
        })
      });
    </script>
  </body>
</html>
Conclusion
As you can see, OpenLayers makes it really easy to create a web map from scratch. With OpenLayers you can also display your own data on a web map. The best part is that OpenLayers is open source and free. That means anyone can use it for almost any purpose. Happy map-making!