Split Screen View and Multiple Map Views in QGIS
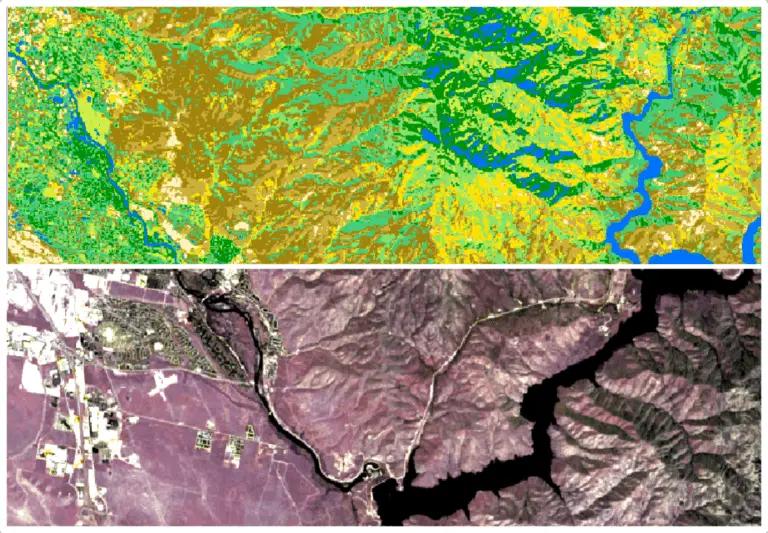
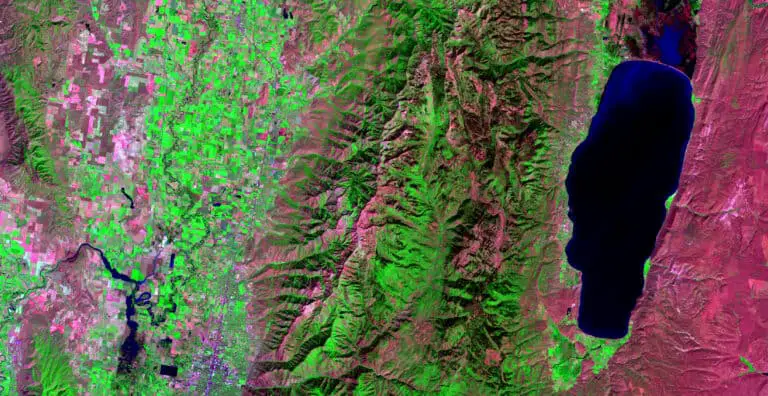
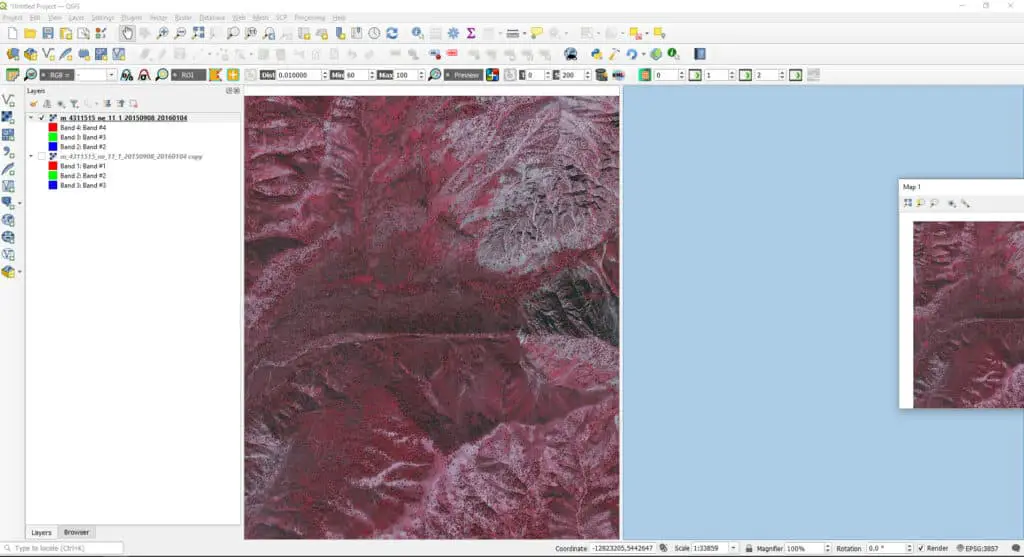
In cartography and GIS, it is to display two different products side by side to make comparisons. This is a powerful and often necessary feature of any serious GIS software. QGIS makes it possible to display multiple map views side by side. However, there are a few steps that are not well documented that you’ll need to take for this to work. Follow along with the directions below to set up a split-screen view, or multiple map canvases in QGIS. By the end of this tutorial, you’ll be able the create a split-screen view (like the one pictured below) with QGIS.
If you’re new to QGIS, or just need a refresher so you can put together the awesome display we’ll make in this tutorial, check out my free tutorial for QGIS beginners before you get started here.
The Basic Process
To create a split-screen map view that shows the same extent with different layers in QGIS we need to go through a few simple steps.
- Add a new Map View to the QGIS interface
- Create a Map Theme for the new Map View
- Synchronize the center and scale of both Map Views
Data for the Map
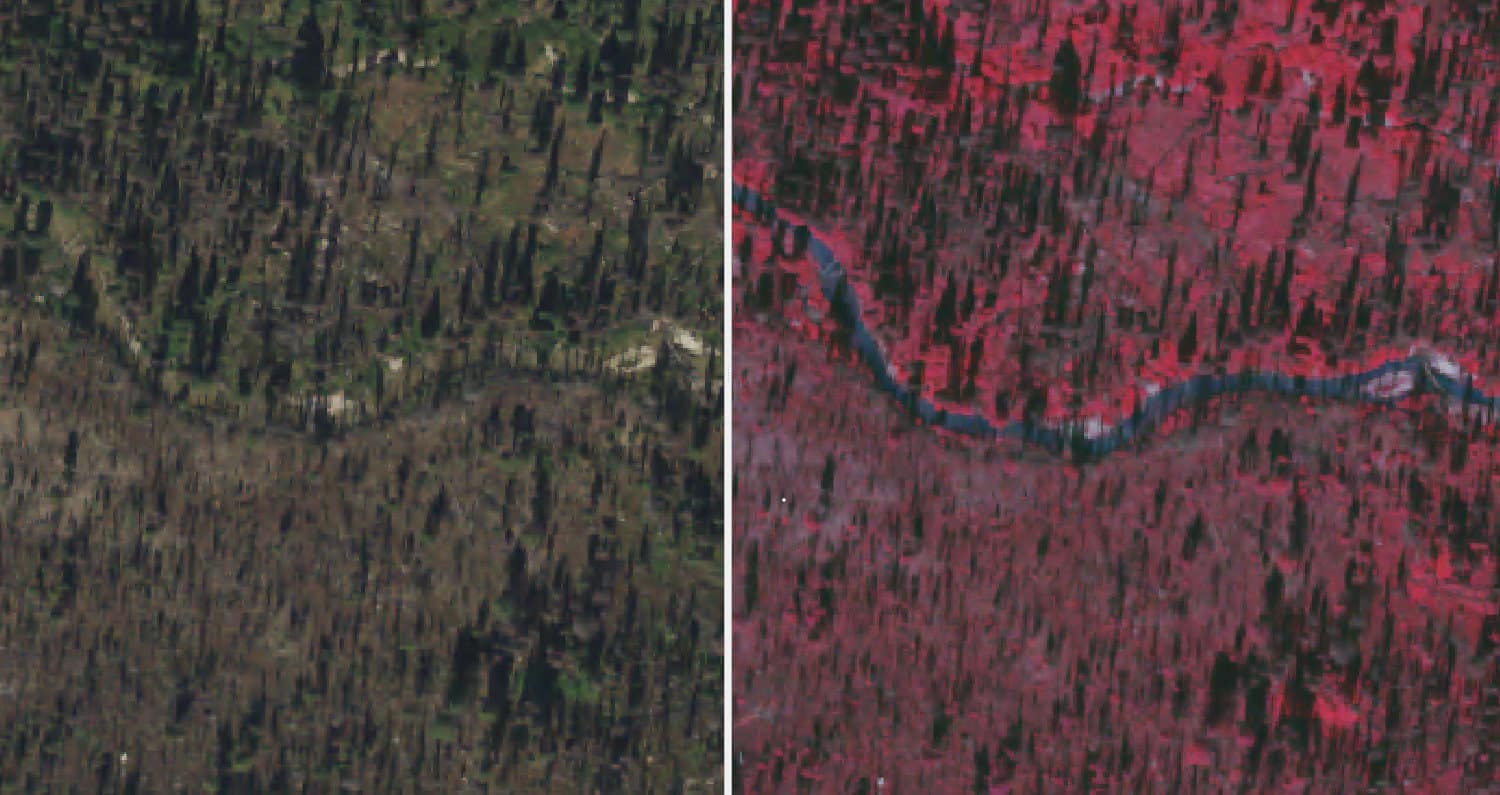
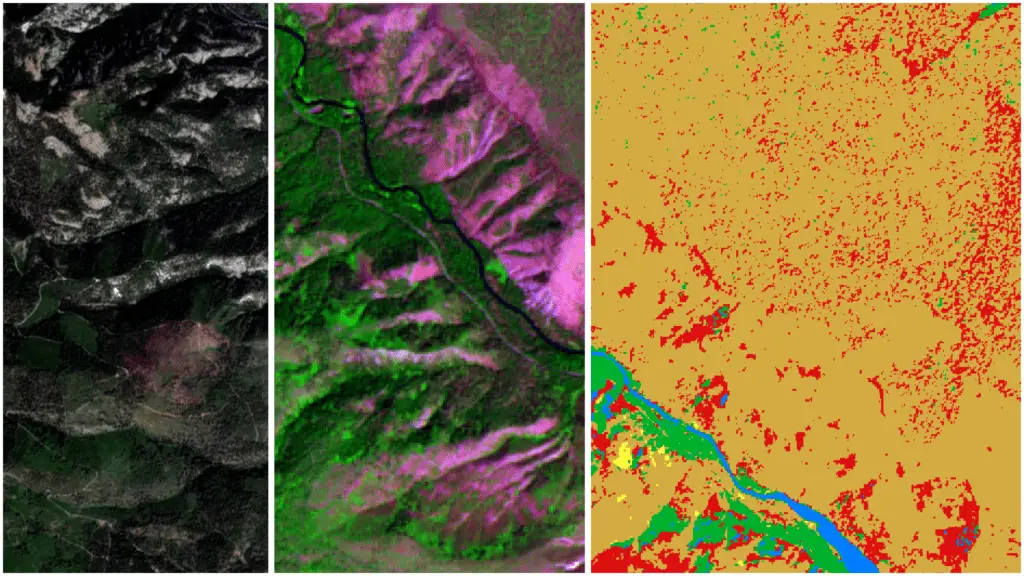
For this example, I’m using two aerial imagery layers. One layer displays the aerial image in true color (R-G-B). The second layer shows the image in a color-infrared (NIR-R-G). I want to show the true color and color-infrared side-by-side to compare and contrast features in the image.
Create a New Map View
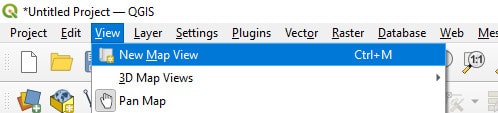
The first step is to create a new map view. Select View > New Map View from the QGIS main menu (see image below). This will create a new window somewhere on your desktop. When the window is created it will probably be quite small and will not be docked to the QGIS interface.
To get a true side-by-side view, you’ll want to dock the new map window to the QGIS interface. Do this by dragging the new map window of the screen to the right side of the interface until a blue box appears (see image below). When the blue box appears release the mouse button and the new map window will dock to the main user interface.
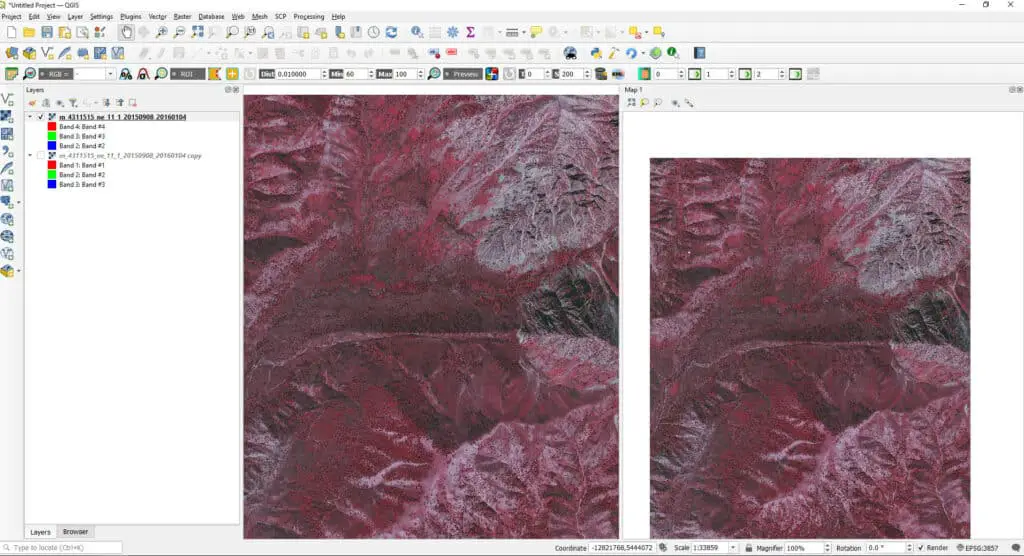
The initial size of the docked map window may not take up the same area as demonstrated here. Once the window is docked, you can hover the mouse over its edge until the sizing arrows appear. Click and drag the edge of the box to resize it to be about half of the total map canvas area (as shown below).
Create a Map Theme
If you turn layers on and off in the Layers panel, you’ll notice that both map windows are updated. With things as they are, we can’t display different layers in each map window. To fix this we’ll need to create a new map theme that we can apply to the new map window.
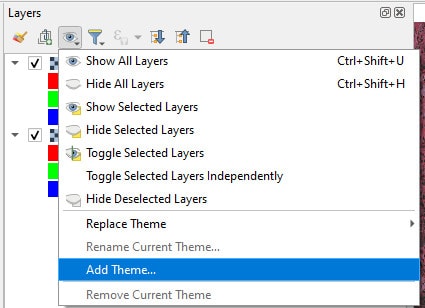
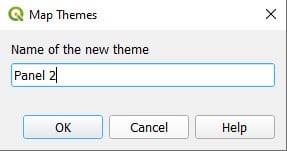
To create a new map theme, click the Manage Map Themes button on the layers panel and select Add Theme (see image below). Then give the theme a name (I’ve named mine ‘Panel 2’) and click OK. The new theme will contain the layers that are currently set to be visible in the Layers panel (in this case the color-infrared image).
To apply the new map theme that you’ve created to the new map window click Set View Theme in the map window and select the map theme you wish to apply (see image below). Once you do this the new theme will be applied. You’ll notice that initially, the layers displayed in the two map views are the same. However, if you turn off layers in the Layers panel only the main map view will be updated and your new map view will maintain the layers set in the theme.

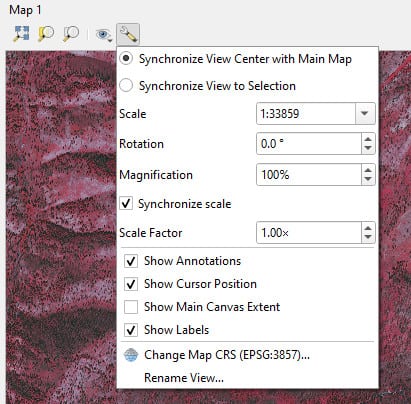
Synchronize the Map Views
Now we have the appropriate layers displayed in each map view, but the map views are displaying different extents at different scales. For a good comparison, we need to display the same extent and scale in each window. We can easily adjust the settings to make this change.
Open the settings window on your new map view. Select ‘Synchronize View Center with Main Map’ and ‘Synchronize Scale’. Now when you zoom or pan in one map view, the other will adjust simultaneously.
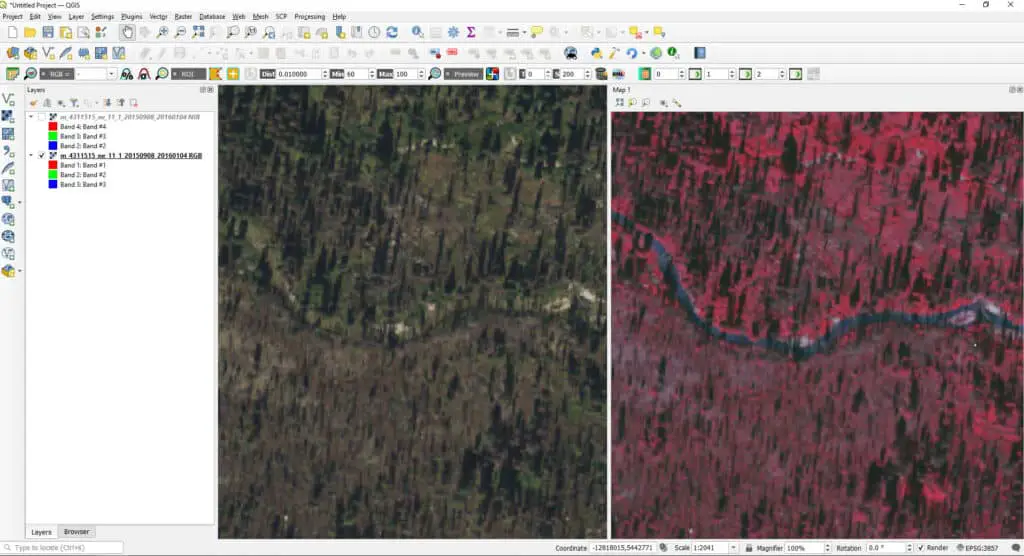
Finally, we’ve created a split-screen view where we can display different layers side by side over the same extent. Hopefully, you’ve been able to follow along and your QGIS window looks similar to mine, which is displayed below.
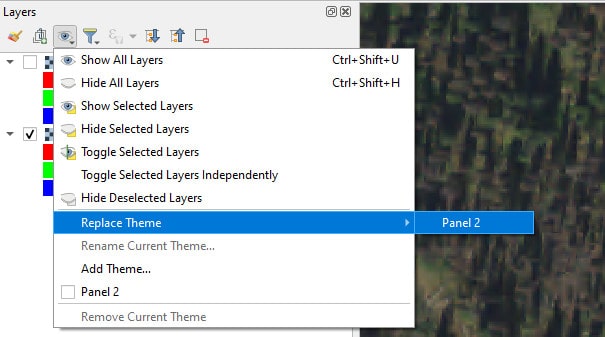
Update Layers for a Theme
After an initial comparison, you may want to change the layer that is displayed in the new map window. To do this you will need to create a new theme and assign it to the map window or update the current theme. This is easy to do. Simply display the layer you wish to show in the main map window. Then click on Manage Map Themes in the Layers panel, hover over Replace Theme, and click on the theme you would like to update. Your new map panel will update with the new theme.
Do More with QGIS
I hope this tutorial has helped expand your knowledge and expertise with QGIS. No doubt showing a synced split-screen display will make you look more professional in the eyes of your clients and employers. There are so many more ways you can use QGIS to create amazing products and solutions. If you’re looking for more basic or advanced skills consider my courses at Geospatial School. You can see some of the offerings in the section below.
Whether you’re looking to take your GIS skills to the next level, or just getting started with GIS, we have a course for you! We’re constantly creating and curating more courses to help you improve your geospatial skills.

All of our courses are taught by industry professionals and include step-by-step video instruction so you don’t get lost in YouTube videos and blog posts, downloadable data so you can reproduce everything the instructor does, and code you can copy so you can avoid repetitive typing