Up next in 10

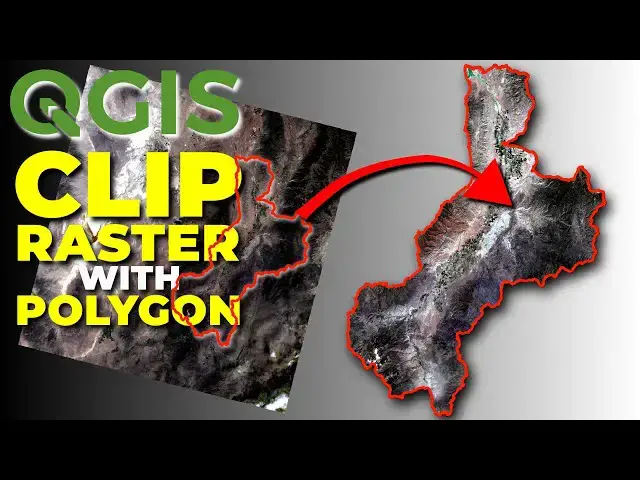
Clip a raster to a polygon shape in QGIS. You can use a polygon from any QGIS-supported vector layer to clip a raster. It just takes one tool. It's quick and easy.
Check out my website for more: https://opensourceoptions.com
Show More Show Less View Video Transcript
0:01
Welcome to Opensource Options. In this
0:04
tutorial, I'm going to show you how to
0:06
clip a raster layer or a satellite image
0:11
to uh a polygon extent. And I'm going to
0:15
use a LANCAT image for this, but you can
0:17
do the same thing with a single band
0:18
raster. So, let's go ahead and get
0:21
started. I have this is a watershed
0:23
boundary that I downloaded from the
0:25
national map. Uh, I'm going to pull in
0:28
some satellite imagery now and show you
0:30
how we can do this. So, let me go and
0:32
find
0:34
my LANCAT folder here. So, I have LANCAT
0:37
images here and I'm going to pull in
0:41
bands one through seven for this image.
0:46
Going to drag those in. Okay. Now, you
0:48
notice these are all single band.
0:50
They're all just grayscale because we
0:52
don't have multiple uh we don't have
0:54
multiple bands to display color. We're
0:56
going to change that right now by
0:58
creating a virtual raster. So going to
1:00
raster, miscellaneous, build virtual
1:04
raster. And here we're going to select
1:06
our input layers. I'm going to select
1:09
all of these. I want to make sure they
1:11
are in order. Bend one, bend two, three,
1:13
four, five, six, seven.
1:16
Click okay. I want to place each input
1:19
file into a separate band. And I can
1:22
keep the other defaults.
1:25
You can save here to a file. I will save
1:27
to a temporary file. And then we're
1:30
going to click run. And this will take
1:32
just a second to build. Now, while that
1:34
runs, I want to let you know to check
1:36
out open-source options.com where I will
1:39
have free courses available soon. I've
1:41
already started working on the first one
1:43
and it's going to be absolut absolutely
1:45
free. So, go check out opensource
1:47
options.com. You can sign up to be
1:49
notified when the courses are live. That
1:52
finished real quick. We are ready to go.
1:53
I'm going to close this. You see my
1:56
virtual raster here? I'm going to get
1:58
rid of these other layers that I no
2:00
longer need. So, let's get rid of these.
2:04
And let's get rid of this.
2:09
And now I'm going to put my watershed
2:11
boundary on top. And then I'm going to
2:16
come to my virtual raster here. And I'm
2:18
going to change the symbology to true
2:20
color which is 4 3 2. And now we see our
2:26
satellite image in true color there.
2:30
Now the next step and our final step is
2:32
to clip this to the shape of our vector
2:38
image. Now this here is a giojson file.
2:41
You can do this with the geo package.
2:44
You can do it with the shape file. you
2:46
can do with any vector file format that
2:48
QGIS supports. So, really simple to do.
2:52
Okay, let's go in. We're going to go to
2:54
raster. We're going to go extraction
2:59
clip raster by mask layer.
3:03
Our input layer is this. Our virtual
3:06
layer is our huck 8, our hydraologic
3:09
unit 8. Um, we're going to see if this
3:12
works. These are two different
3:13
coordinate reference systems. So it
3:15
could pose some problems and if it does
3:17
we I will show you how to deal with
3:19
that.
3:20
Okay. And now
3:25
we can go through and look at these. I
3:28
think we don't need to do anything.
3:31
We want to match the extent of the
3:33
clipped raster to the extent of the mask
3:35
layer.
3:37
And now
3:40
we can come down and we can decide if we
3:43
want to save this to a temporary file or
3:46
if we want to save it to a file. I will
3:48
save to a temporary file for now. You
3:50
can save to a file if this is an output
3:52
that you want to save. Let's go ahead
3:54
and click run.
3:57
It'll take just a minute to complete.
3:59
That's finished. We can click close. We
4:01
can turn off the virtual layer. And now
4:04
you can see we indeed have a clip layer
4:08
right where we want it. And we can
4:10
change this to match the symbology. So 4
4:13
32.
4:14
And this symbology will not match
4:16
exactly because we now have different
4:18
min and max values for each band. So you
4:21
can see that we end up being a little
4:22
brighter just by virtue of the data
4:25
range of the new raster. Now let's go in
4:28
and just check and see what I just
4:32
double clicked on double clicked on that
4:33
layer to get the properties and we can
4:35
go see what our reference system is and
4:39
you can see it gave us the reference
4:42
system the CRS of the original raster.
4:46
So there you have it. That is how you
4:48
can clip a raster to a polygon shape in
4:52
QGIS. Very simple, very easy to do. You
4:56
can do this with the multiband raers or
4:58
with single band raers. If you have
4:59
questions, leave them in the comments
5:01
below. I try to get to every one of
5:03
those. And remember to check out
5:04
opensource options.com so you can see
5:07
when those free courses come online.
5:09
Thank you for watching.