live_tv
Livestream Starting Soon
00
Hours
:
00
Minutes
:
00
Seconds
Up next in 10

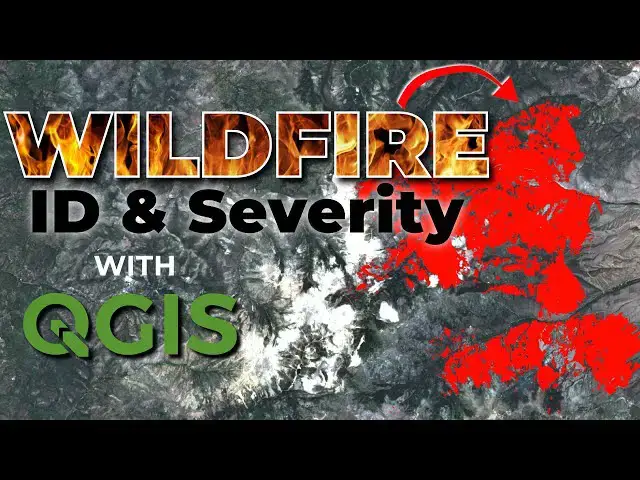
Learn how to use the Normalized Burn Ratio (NBR) to identify wildfires using Sentinel-2 satellite imagery with the QGIS software. You'll learn how to calculate NBR and delta NBR. With delta NBR you can calculate wildfire severity.
More QGIS + Sentinel-2 videos: https://www.youtube.com/playlist?list=PLoaxBPcx2tRDNJlI8KXkVMl0PO-JCbEqM
Check out my website: https://opensourceoptions.com
Show More Show Less View Video Transcript
0:00
Welcome to Open Source Options. In this
0:03
tutorial, I'm going to show you how you
0:06
can make a burn severity map using
0:08
Sentinel 2 satellite data that you can
0:11
get for free. And I'll show you how to
0:13
get rid of artifacts you might see like
0:15
this, which are actually agricultural
0:17
fields. We can get rid of those. And I'm
0:19
going to show you how to do all this
0:21
today with free data on OpenSource
0:24
Options. Before we get started, um you
0:27
might want to go check out opensource
0:29
options.com. I'm in the process of
0:31
creating some free courses. These are
0:34
full courses, professionally done
0:36
courses that are free. They're not ready
0:38
yet, but they will be soon. So, if
0:40
you're watching this video in the
0:41
future, they might be there for you. All
0:44
right, let's go ahead and get started.
0:46
I'm going to remove some data here so
0:48
you can see what I'm starting with.
0:50
Let's
0:51
remove all these layers.
0:55
And what I have remove this would
0:59
also and so what I have here I have four
1:02
layers. These are all Sentinel 2 bands.
1:06
Let's look at the file names to see what
1:08
they mean. So these are both all from
1:10
the scene T12 SU. Okay. So you see all
1:14
these are T12
1:15
SU. And here this file name has the date
1:20
in it. So we can see here 2024
1:24
6204 620 this is band 8A and band 12
1:28
band 8A is near infrared band 12 is
1:31
shortwave infrared we'll use those to
1:34
calculate the normalized burn ratio and
1:37
then I have for the same scene uh bands
1:41
8 and 12 for uh July 30th of the same
1:47
year. So we have June 20th and July
1:49
30th. Okay. Now, in this area in the
1:53
early July, there was a wildfire, and
1:55
I'm going to show you how you can
1:57
identify that here in just a minute. Um,
2:00
we might actually be able to see it in
2:02
the data. Let's zoom out just a hair.
2:04
Let's see if we can notice where that
2:07
wildfire is. And you can see it here in
2:10
the near infrared. You can see very well
2:13
where that fire is in the near infrared
2:15
band. Let's just switch between these.
2:18
So, here it is in
2:21
um June. Here it is at the end of July.
2:24
And you can see how that changed. You'll
2:28
also notice how some agricultural fields
2:30
changed.
2:32
Um and so we have to account for some of
2:34
these things as well. All right, let's
2:37
go in and let's start calculating this.
2:40
Going to turn all these layers back on.
2:43
Now, the first thing we want to do is
2:44
calculate the normalized burn ratio. And
2:47
we want to calculate this
2:50
for both August and June. And I'll show
2:54
you why uh when we get to that point.
2:57
But let's start by just running the rest
2:59
calculator. So on the main menu, go to
3:01
raster raster calculator and let's
3:04
calculate the normalized burn ratio. If
3:07
you're not familiar with normalized
3:09
difference indices,
3:11
um, in my video on NDVI, which I'll link
3:14
in the playlist below, and the video on
3:17
the soil moisture index, which will be
3:18
linked, it will be in the playlist
3:20
linked below, we talked about those in a
3:22
little more depth. We're going to
3:24
subtract two bands on the top and divide
3:27
by the sum of those two bands on the
3:29
bottom. So, our expression will look
3:31
like this. And let's start by doing this
3:33
for June. Make sure I select June. And I
3:36
want to do 8A which is near
3:38
infrared
3:39
minus shortwave infrared which is band
3:42
12. Now I'm using band AA here. And the
3:45
reason I am using band 8A I will show
3:48
you. It's a very practical
3:49
reason. Well, it's because the 20 meter
3:53
data have band 8A but not band 8. And
3:58
the 10 m data have band 8 but not band
4:01
12. So, I have band 8A and band 12 in 20
4:05
meter. Um, you'll get slightly different
4:07
results if you use band 8, but they will
4:09
still be valid results. The only
4:11
difference between band 8A and band 8
4:14
with Sentinel 2 is that band 8A has a
4:18
narrower wavelength range, which is just
4:20
fine. Okay, so now we're going to add
4:22
these two on the bottom here. It does
4:25
not matter which order they are in.
4:27
We'll keep the same order. Try to just
4:29
for clarity here. You do want to do near
4:32
infrared minus shortwave infrared band
4:34
AA minus band 12 on top and then the sum
4:37
on the bottom. Let's save an output
4:39
layer here. I'm going to overwrite the
4:41
one that I made um when I did the the
4:44
test of this tutorial. So I'll click
4:46
save. NBR June save. I'm going to
4:49
replace it and I'm going to say okay so
4:53
that this calculates. This will take
4:54
just a moment to
4:56
calculate and I will pause the video
4:59
while it does. All right, we have
5:02
calculated the NBR for June. I'm going
5:04
to slide this down here. Now, uh we
5:08
don't see the fire here yet. Let's go
5:09
calculate the NBR for the end of July.
5:13
We'll do it the exact same way with
5:15
raster raster calculator. I'm going to
5:18
enter my expression here uh just to make
5:22
it a little easier on myself.
5:25
And now we want to do band 8 a for July
5:31
minus band 12 for July and then the sum
5:35
of those two bands here 8day and 12.
5:40
Make sure that we have the July date for
5:42
all these images. And we do. Now we'll
5:45
save this to a file. And this will be
5:47
our NBR for August. I will overwrite my
5:49
existing file. You'll be creating a new
5:52
file. And let's say okay. And once
5:55
again, I'll pause while this
5:58
calculates. Okay. And now you'll notice
6:01
we can really see where that fire was
6:04
that occurred in uh July. We can really
6:10
see that pop out. Now, if we zoom down
6:12
here to the bottom part, we can see some
6:15
fire that's not quite as severe. If we
6:18
turn off our August normalized burn
6:19
ratio, it appears like there was an
6:22
existing fire, a fire maybe the year
6:23
before that happened there. And when we
6:25
turn this back on over this time period,
6:29
we have
6:32
uh some
6:35
[Music]
6:37
additional fire occurring. So we can see
6:39
everything that's changed in this time
6:41
period. Okay. Now, let's do some
6:45
thresholding so we can identify only the
6:48
fire that happened here. And to do that,
6:50
we're going to go to our August
6:52
NVR
6:54
and we're going to uh go to our layer
6:58
styling panel and we're going to change
7:01
this to a single band pseudo color. And
7:05
then we're going to come down and we're
7:06
going to change this interpolation from
7:09
from linear to exact. And we're going to
7:13
change the mode continuous to equal
7:14
interval. And we'll change the number of
7:17
classes to two. Okay. And now we'll have
7:22
black for
7:24
um
7:26
unburned and we will
7:29
have this yellow color for burned. And
7:33
let's do this the other way around.
7:34
We're going to have the black color. The
7:36
top color will be for the burned areas.
7:38
And we can just double check this by
7:40
going to our value
7:42
tool. And if we come over, this is not
7:45
showing up right now. We had to change
7:48
the symbology. Let's just change this
7:50
real quick. And we'll just get some
7:51
colors showing up
7:56
here. So to see this, let's just turn
7:58
these layers off real quick. and we'll
8:01
turn
8:02
on. We want our band 8A from August to
8:07
be turn from July to be turned on, which
8:09
is here. And now we can see where that
8:12
is. And let's turn this back on. It's
8:15
not showing up because of the symbology.
8:17
We can go to our values. We'll just get
8:18
an idea of what these values are. So we
8:20
can come in here and see that our values
8:22
are all below zero for the burned areas
8:26
and most of them are
8:27
below. It would appear. Okay. Okay. So,
8:30
let's come back to our symbology, our
8:32
layer styling,
8:34
and let's make
8:46
this.2
8:49
and change the color here to let's try
8:52
red and
8:54
black. That still is not showing up.
9:03
Okay, so I think I figured out what the
9:05
problem is and I told you something that
9:07
was wrong here. So I have my values here
9:09
set to0.2
9:11
and0.5. Um, as long as you're close to
9:13
that, you should see this happen. The
9:15
interpolation should be discreet, not
9:17
exact. Okay, so here we go. Now we can
9:20
see everything is red, which is not what
9:23
we want. Let's change this to.2.
9:28
And there we can see our fire is popping
9:30
out in black. Our burned area is popping
9:32
out in black and our unburned area is
9:35
red. Let's go ahead and change this. We
9:37
can change this actually to be
9:40
um transparent like this. And we can
9:45
change uh this. Let's make this red. So
9:49
we'll just slide our color wheel over
9:51
here. Make this red. And now we can
9:54
Oops. Now we can see where that burned
9:56
area
9:57
is. And now we can adjust this value and
10:00
maybe make this
10:01
negative0.1. And that fills in a little
10:04
more. You can also see that we have some
10:06
other areas popping out as potential
10:08
burns that probably aren't burns. Um,
10:15
but you can see it gives us a really
10:18
good starting point for this. Okay. All
10:20
right. So now we've identified the
10:23
likely area that burned. We can maybe
10:26
even adjust this. I'm going to try
10:29
negative0.15. Zoom in and see how this
10:35
looks. I think I like
10:37
uh0.1 a little better. So we're going to
10:41
do that. And that's going to be what
10:43
we're going to use to find our burned
10:45
areas. Okay. So, we've kind of put this
10:49
here to show we're displaying our burned
10:50
areas uh just with the NVR. What I want
10:54
to do is I want to take this and make it
10:56
its own layer. And to do that, I'm going
10:59
to use raster calculator again. So,
11:01
let's go raster raster calculator. And
11:05
we want to grab NBR
11:08
August. And we want to say where this is
11:12
less
11:19
than0.1. Okay. And what this is going to
11:22
do is it's going to give us a raster
11:25
that is burned and unburned. And I'll
11:27
show you what this looks like. Let's
11:28
save this to a file. And let's call this
11:33
August
11:34
burned unburned.
11:37
So what we'll get here is we'll get a
11:39
one where this is true and a zero where
11:41
it's false. So let's go ahead and click
11:42
okay to run this. And once again, oh
11:45
there we go. We're done. So we have a
11:48
one where it is true and a zero where it
11:52
is false. Okay, pretty simple to
11:57
do.
11:59
Now let's close that out for
12:02
now. Okay, so we've identified where our
12:05
burned areas are.
12:07
The next thing we want to do is we want
12:09
to identify the severity of the burn.
12:12
And we're going to do that by
12:14
calculating the delta NBR. The delta NBR
12:19
is just the difference between a time
12:21
before the fire and a time after the
12:23
fire. And I'll show you how we do that
12:26
right now. And we also do that using the
12:30
raster calculator. All right. So, let's
12:33
go. And I'm going to go to raster raster
12:37
calculator. And we're going to take NBR
12:41
June minus NBR August. Going to save
12:45
this to a file. We're going to call
12:48
this delta
12:51
NVR. Okay, let's save this. And let's
12:55
click okay to run this. Once again, I'll
12:57
pause while this calculates. It might
12:59
take just Oh, it didn't take very long.
13:01
Okay, good to know.
13:03
Okay, so now we have our delta NBR. If
13:07
we look at this, notice this color bar.
13:09
We'll notice we have high delta NBR in
13:12
areas that burned and low delta NBR in
13:16
areas that did not burn. You'll also
13:19
notice we have high delta NBR in some of
13:22
these agricultural fields which
13:24
experienced a lot of change uh between
13:27
our pre and postfire dates. We can
13:30
eliminate some of those. I think I hope
13:33
if we let's turn on our burned and
13:35
unburned and let's see where these
13:37
overlap. So we can see that a lot of
13:39
those agricultural fields show up as
13:42
unburned. So if we intersect these
13:45
files, we can start to figure out where
13:48
our fire is and what its severity is.
13:52
Now the way we're going to do this is we
13:54
want to get rid of anything that's not
13:57
burnt. Okay? So whether these areas
14:00
here, some of these might be a little uh
14:02
erroneous, but we can at least start to
14:04
pick out this area here and get rid of
14:07
the agricultural fields. And we can do
14:09
that with one more raster calculation.
14:12
So we can do raster
14:15
calculator and we can multiply our
14:17
burned and unburned multiply here by
14:21
delta NBR. So
14:25
remember this
14:28
has a
14:30
zero where it was unburned. So if we
14:33
multiply these anything in delta NBR
14:37
will come to zero that was unburned.
14:40
Okay.
14:41
And
14:42
anything in delta NVR that is greater or
14:46
anything in delta n anything that was
14:50
burned gets multiplied by one. So we'll
14:52
retain the value of delta NBR. Let's do
14:56
this. And let's go call this delta NBR
14:59
for the burned
15:05
area. And let's save that. And let's
15:08
click okay to run this.
15:11
It's taking just a second, but it won't
15:12
be too
15:14
long. And once we have this, we're going
15:17
to have our burn area. And look, we
15:20
filtered out a lot of those areas
15:23
um where that were unburned, but we had
15:27
information for. Okay. So, we can really
15:29
see that fire and that burned area here
15:32
pop out and we're losing a lot of those
15:34
agricultural fields. So, I'm going to
15:36
just turn off a lot of these layers to
15:37
clean things up for us.
15:41
This is what we're going to work with
15:42
here. And now what we can do is we can
15:46
go just symbolize this a little bit to
15:48
get our um burn severity map because the
15:52
delta NVR can tell us how severely an
15:55
area burned. You'll want to go look
15:56
these values up. And we're using band AA
15:59
and not band 8. So they could be a
16:01
little different. We're going to
16:02
symbolize it nonetheless so you can see
16:04
how to get a fire severity map. So let's
16:07
go in and let's change this to single
16:09
band pseudo color. Let's change um this
16:14
interpolation to
16:15
discrete. Let's click
16:19
classify. Let's click equal interval.
16:22
And I think we want I think it's four
16:25
classes. We're going to click
16:28
classify. And now we can start. We
16:32
want five classes. Sorry, five classes.
16:36
classify and now we can put these values
16:40
in. So the highest severity so high
16:42
severity is 0.66 and greater. So this
16:45
light color and then we have
16:49
0.44
16:52
0.27 and
16:55
0.1. So anything less than 0.1 would be
17:00
considered unburned. And then we have
17:02
our severity for these additional
17:06
classes. As we look at it here, we can
17:08
see we had some some small high severity
17:10
areas and the rest of this was um uh a
17:14
lot of it was severe with some low
17:16
severity areas around the edges. Right?
17:19
So that is how you can identify
17:21
wildfires and how you can
17:26
um calculate the extent of a wildfire.
17:29
Now one final thing you can do uh
17:35
is you
17:37
could take the burned and unburned
17:42
areas. You could take these areas where
17:44
we have NBR that is greater than 0.1 and
17:47
you could once again make an burned
17:49
unburned and you could then go ahead and
17:52
you could convert that to a polygon if
17:54
you wanted a polygon outline of where
17:57
the fire was. That might take a little
17:59
extra work and some digitizing to fix
18:01
things up, but this gives you the basic
18:03
idea. Um, as always, I hope this was
18:06
useful. If you have ideas for future
18:08
videos, feel free to leave a comment
18:10
below. And remember to check out Open
18:13
Source Options to see those free courses
18:17
and if they might be something you are
18:19
interested in.
#Science