Use Python to Convert Polygons to Raster with GDAL.RasterizeLayer
When you work with spatial data it’s inevitable that you will need to implement information from both a vector and raster data source for the same location. This task can easily be accomplished manually, but it often becomes quite cumbersome when the process must be automated across a large number of features, time periods, and/or datasets. Discrete, irregularly shaped polygons do not always play nice with structured, rectangular grids.
In such situations, conversion from vector to raster (or sometimes vice versa) is often the best option. In a previous example, I demonstrated how vector to raster conversion can be implemented to calculate raster statistics within polygon boundaries. In Python, the root of polygon (vector) to raster conversion lies with the gdal.RasterizeLayer() function. This article demonstrates multiple usages of gdal.RasterizeLayer().
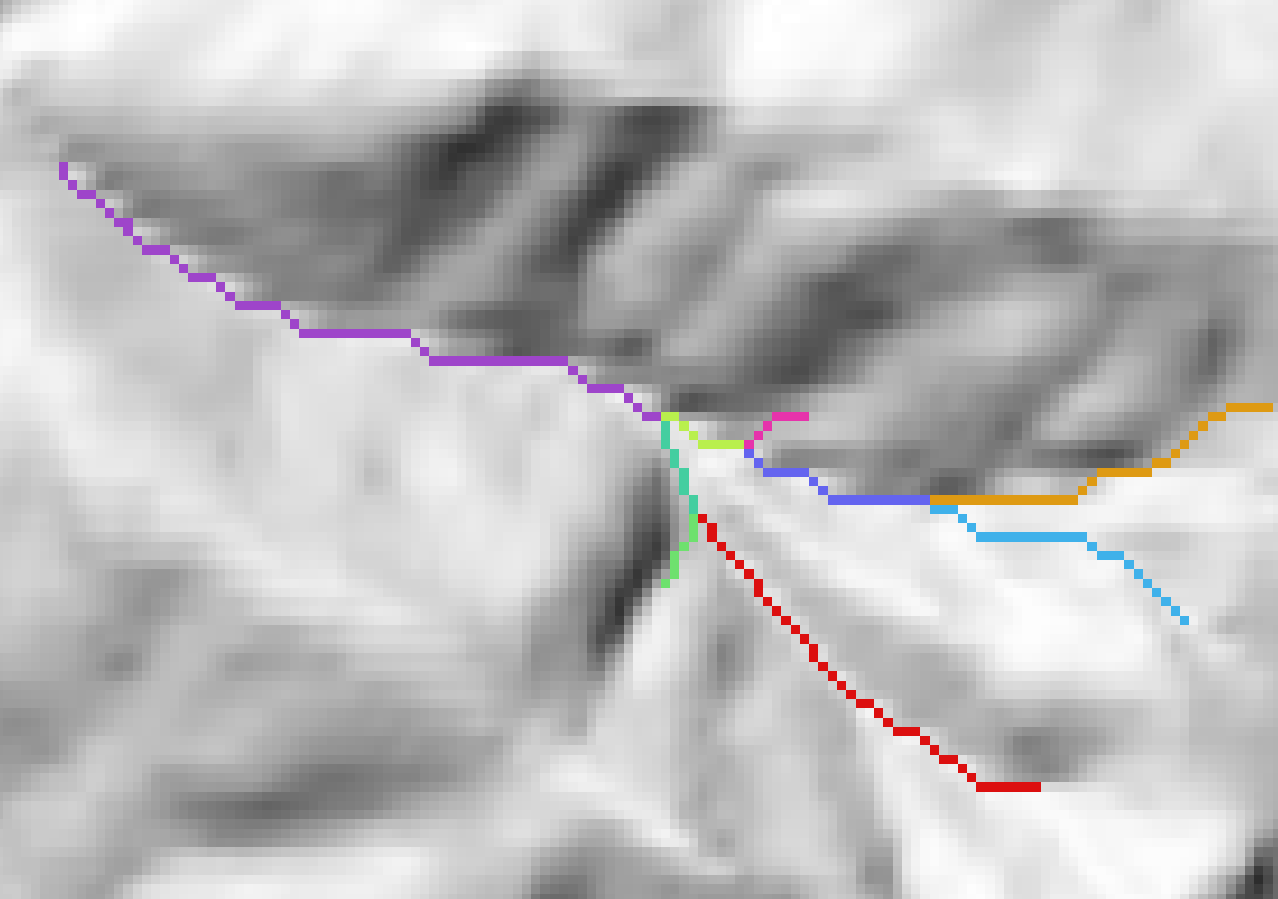
For this example, we’ll consider how to rasterize the channel network, shown below, which is represented by polygons. This is a simple example because the channel network is concurrent with the underlying grid, so no resampling of either layer needs to occur.

Imports and Input Data
We’ll use the OSGEO Python modules to handle geographic data: gdal for raster data and ogr for vector data. Then we need to load a raster and a polygon layer. We’ll also need the geotransform values for the raster. For best results, ensure that both the raster and vector datasets use the same coordinate reference system.
import gdal
import ogr

fn_ras = 'path/to/raster'
fn_vec = 'path/to/vector'

ras_ds = gdal.Open(fn_ras)
vec_ds = gdal.Open(fn_vec)
lyr = vec_ds.GetLayer()

geot = ras_ds.GetGeoTransform()
Setup the New Raster
Now use gdal to create a new raster for the rasterized polygons. In this case, I’m making the new raster concurrent and orthogonal with the input raster. You can see my zonal statistics tutorial for an example of dynamically adjusting raster size for polygons.
drv_tiff = gdal.GetDriverByName("GTiff")
chn_ras_ds = drv_tiff.Create(out_net, ras_ds .RasterXSize, ras_ds .RasterYSize, 1, gdal.GDT_Float32)
chn_ras_ds.SetGeoTransform(geot)
GDAL.RasterizeLayer()
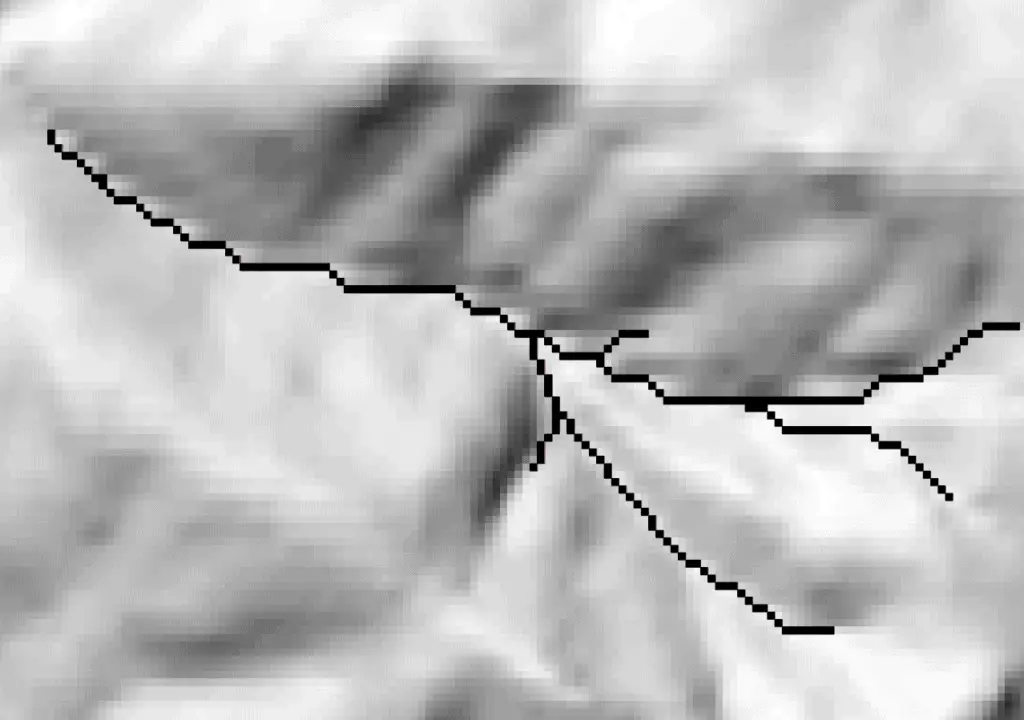
Here comes the rasterize magic. We’re simply going to pass the new, empty raster, the band number of the new raster to update (band 1, the only band in our case), and the layer to rasterize to gdal.RasterizeLayer(). In this case, the result is a value of ‘1’ inside of polygons, and ‘0’ outside of polygons. By assigning a no-data a value, we get the output image below.
gdal.RasterizeLayer(chn_ras_ds, [1], lyr)
chn_ras_ds.GetRasterBand(1).SetNoDataValue(0.0)
chn_ras_ds = None
Rasterize By Attribute
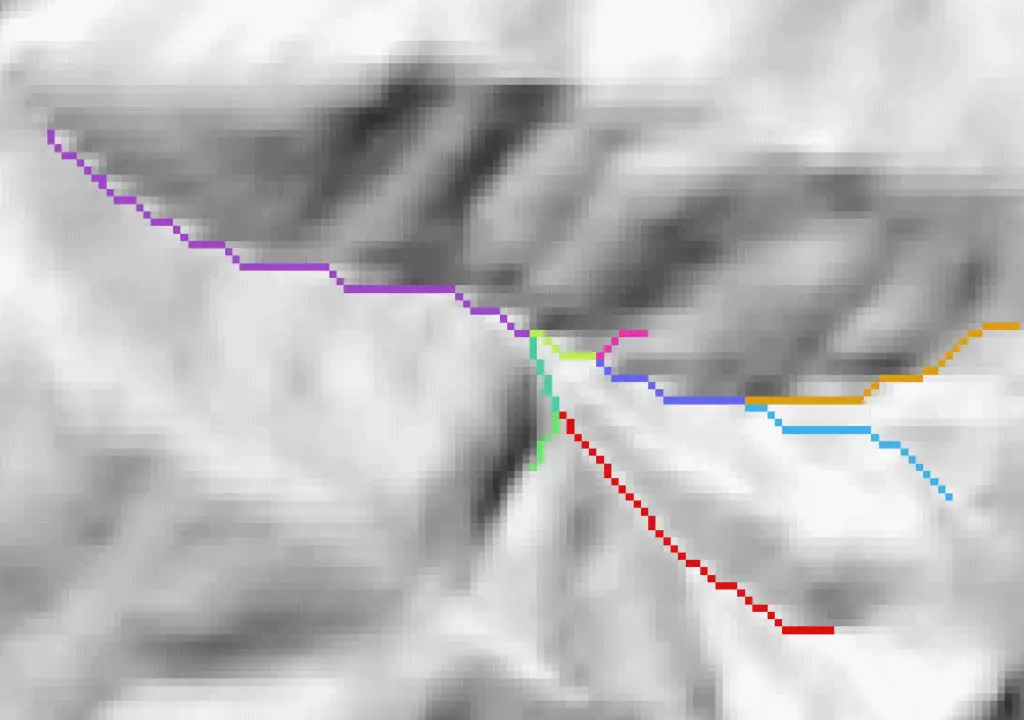
Sometimes you may want to preserve a value from the vector attribute, like an identification value. This can easily be accomplished with gdal.RaterizeLayer() using the options, or attribute argument. You may want to review the documentation for the rasterize options.
gdal.RasterizeLayer(chn_ras_ds, [1], lyr, options=['ATTRIBUTE=chn_id'])
chn_ras_ds.GetRasterBand(1).SetNoDataValue(0.0)
chn_ras_ds = None
Now you can see that each reach has been rasterized according to the channel id (chn_id) value.
Conclusion
The rasterize functionality from GDAL is a quick and easy way to automate polygon conversion with Python. GDAL is written in C++, with bindings for Python, so it is computationally efficient and can easily be scaled to supercomputing projects. This article has covered two common and basic implementations of gdal.RasterizeLayer(). There is more room for customization as you work on specific development needs. If you’re looking for a method to implement conversion as you scale up your geoprocessing workflows give these ideas a try.