Run Python and Start an Interactive Session from the Windows Command Prompt (Terminal)
Python is a very versatile and popular cross-platform programming language that is used for many computational tasks. One thing that makes Python so versatile is that scripts can easily be run from both integrated development environments (IDEs) and the command prompt or terminal (check out this tutorial for instructions).
Additionally, you can type and run Python code directly in the terminal. This can be very useful to do some basic testing or quick analysis. If you’re not familiar with Python installations or have multiple Python installations, it can be difficult to get an interactive Python session to work properly.
If you can’t get Python to run from the Windows command line or terminal it’s probably because Windows doesn’t know where your Python installation is. Often, if you type python into the terminal and press ‘Enter’ it will open the Windows store so you can install Python.
Don’t worry. These problems are easy to fix. Once you understand a few basic principles and methods you’ll be able to start an interactive Python session for any Python version or installation on your machine. This article presents three ways to get Python working on your Windows computer.
Use the Anaconda or Miniconda Python Distribution
The easiest way to ensure that you can start an interactive Python session in the command prompt is to install the Anaconda or Miniconda Python distribution.
Anaconda and Miniconda are Python installations that come with many popular, and useful, Python packages already installed. The Anaconda installation is quite large because of the number of packages it includes. Miniconda includes fewer packages so that it has a smaller installation size.
Both Anaconda and Miniconda will install their own command prompt that made it very easy to start an interactive Python session or to run Python scripts from the command line.
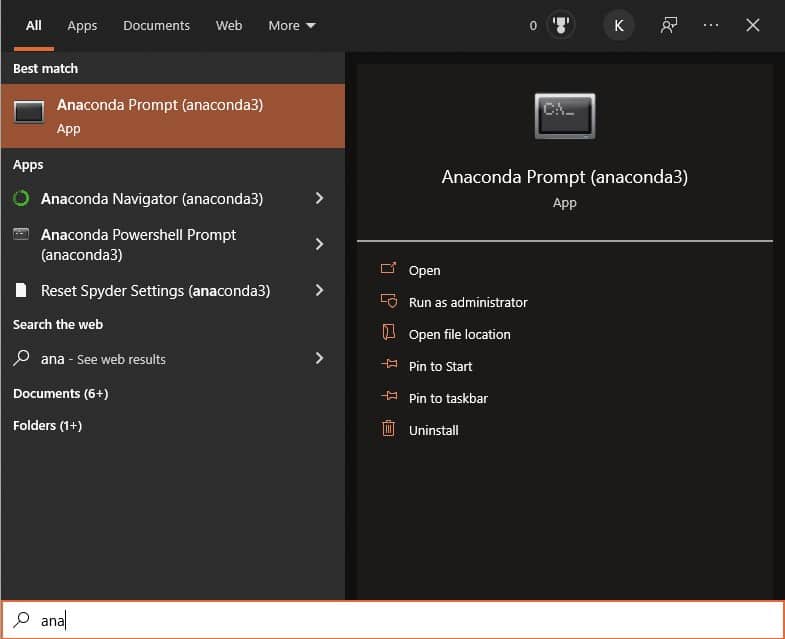
To start an interactive Python session with the Anaconda Prompt:
- Open the Windows Start Menu and search for ‘Anaconda Prompt’.
- Click on the Anaconda Prompt application to open it.
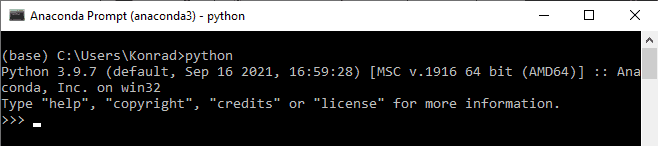
- Once the Anaconda Prompt is open, type
pythonand press ‘Enter’. - You see that the Python version information has been printed out and three greater than (
>>>) symbols indicate that the command prompt will interpret the inputs as Python code.
Using Anaconda (or Miniconda) simplifies this process because the Anaconda installation takes care of all the work. However, if you prefer not to use Anaconda, there are other methods to get an interactive session working.
Create a Windows Batch File to Set the Python Path and Environment Variables
If you know you have Python installed but running the python command in the terminal doesn’t work it’s probably because Windows doesn’t know where your Python installation is. There are two easy ways to fix this.
- Create a batch file that sets the appropriate environment variables and opens a command prompt
- Change your system’s environment variables
I prefer to use the first method because you can create batch files for multiple Python installations (if you regularly use different installations) without confusing your system (or yourself).
Before you start, make sure you have Python installed and know the path of your installation location. You can install the most recent Python version from the python.org/downloads.
Configure Python with a Windows Batch File
Once you have Python installed it’s easy to create a Windows batch file that will set environment variables and launch a command prompt that is aware of your Python installation.
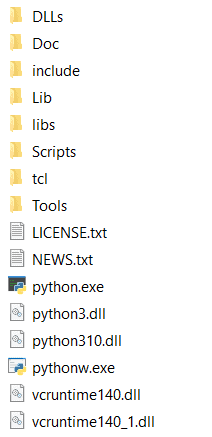
Make sure you know where you have installed the Python distribution. Mine is located here: C:\Python\Python310\. The directory structure of the Python installation is shown in the image below.
We need to let Windows know where it can find the Python interpreter (i.e., executable), installed packages and resources, and any associated DLLs.
To do this we need to add the directories containing these resources to the Windows PATH variable. If we do update the PATH variable in a batch script, then launch the command prompt (cmd.exe) we won’t make permanent changes to the PATH variable, which could affect other programs.
First, we’ll specify the PythonDIR variable, which gives the root path of the Python installation.
Second, we’ll add PythonDIR and PythonDIR\Scripts to the PATH variable and append the current PATH variable for the system. This tells Windows where it can find the Python interpreter and other scripts (i.e. commands) we will want to call from the terminal.
Third, set the PYTHONPATH variable. This tells Windows where to find all the libraries, packages, and other resources associated with the Python installation.
Fourth, we’ll set the file extensions associated with Python.
Finally, use start cmd.exe to launch a terminal that is aware of the system settings we just configured.
Here’s what the full batch file looks like. Be sure to replace C:\Python\Python310 with the path to your Python installation. It batch should have the extension .bat. You can create this file with any text editor.
@echo off
set PythonDIR=C:\Python\Python310
set PATH=%PythonDIR%;%PythonDIR%\Scripts;%PATH%
set PYTHONPATH=%PythonDIR%\Lib;%PythonDIR%\Lib\site-packages;%PythonDIR%\DLLs;
set PATHEXT=%PATHEXT%;.PY;.PYW

start cmd.exe
Once you’ve created the batch file (as shown below), double-click the file, and a new terminal window will launch. Now when you type python and press ‘Enter’ you should see the Python version displayed followed by >>>.
Add Python Directories to the Windows PATH Variable
I recommend using one of the two methods above to start an interactive Python session with Windows. However, if you have a specific need that those methods don’t address then you can add the Python directories directly to the Windows PATH variable. This is not hard to do.
Follow the directions from this webpage to change or add your system’s environment variables.
You will need to add PythonDIR and PythonDIR\Scripts to the PATH variable (where PythonDIR is the root folder of your Python installation). You will also need to add PythonDIR\Lib, PythonDIR\Lib\site-packages, and PythonDIR\DLLs to the PYTHONPATH variable (you may need to create the PYTHONPATH variable before you can add the directories).
Once you’ve done this, you can open the system’s command prompt, type python, and press ‘Enter’ to start an interactive Python session.
Conclusion
If you’re new to Python, it can be frustrating to figure out how to start an interactive Python session on Windows. Luckily, it’s not very hard to do once you understand a couple of simple concepts. I find Anaconda or Miniconda is the easiest way to get a reliable Python installation on Windows. If you prefer not to use those distributions, then it only takes a few lines of code to create a batch file that can make Windows aware of your Python installation. I don’t recommend changing the Windows environment variables directly, but it may be what some users need.