How to Install GDAL for Any Operating System
GDAL, the Geospatial Data Abstraction Library, was designed to interact with raster and vector (geospatial) data. Over time it has evolved to include sophisticated data manipulation and analysis tools. The GDAL source code is C++, which makes it fast to run but difficult to install.
Many software and applications use GDAL for handling and analyzing geospatial data. It is such a powerful and ubiquitous software that many geospatial workflows can be performed using only GDAL. it can be easily deployed on the desktop or in the cloud, as a command-line program, written in scripts, or the backend analysis engine for a GUI.
This article will help you get GDAL installed on any operating system so that you can leverage its power for your geospatial work.
IMPORTANT: For all installation methods, try to remember the directory where GDAL will be installed. For some installation methods this may not be apparent (that’s okay), but remember it if you can. It will help if you need to troubleshoot later.
Install GDAL for Windows
Use the OSGeo4W Network Installer
The OSGeo4W Network Installer installer gives you access to several different pieces of open-source geospatial software (including QGIS and GRASS GIS). It is very easy to use.
Follow these steps to install GDAL with the OSGeo4W Network Installer:
- Download the installer from https://trac.osgeo.org/osgeo4w/
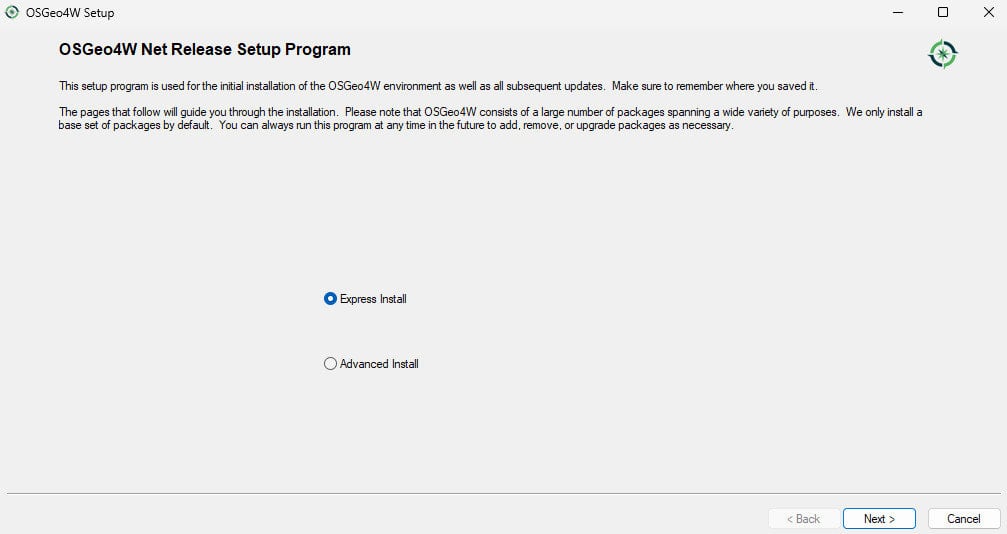
- Open the installer
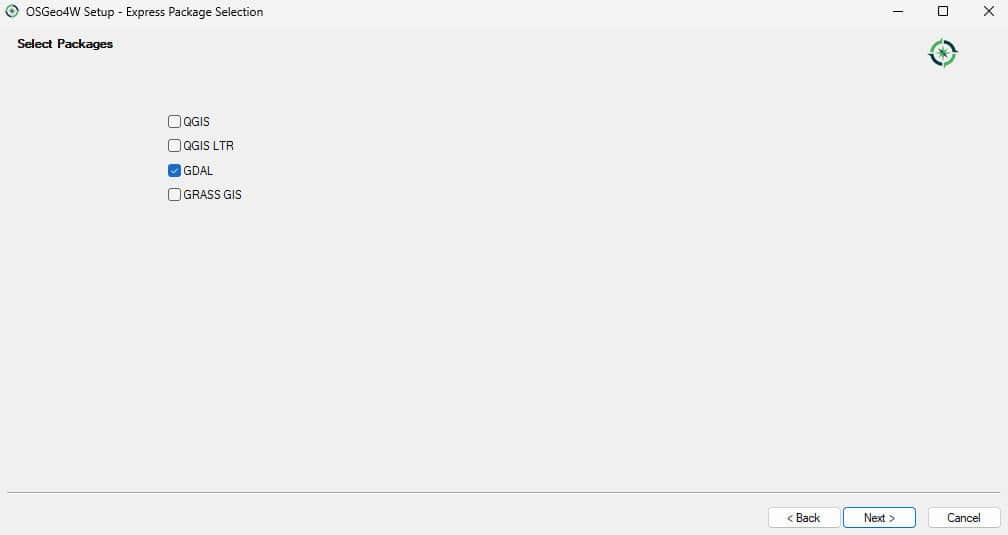
- Select ‘Express Install’ (you can also use “Advanced Install” if you have specific needs)
- Select the packages to install
- Wait for the installation to complete
After installation, the easiest way to use GDAL is with the OSGeo4W terminal.
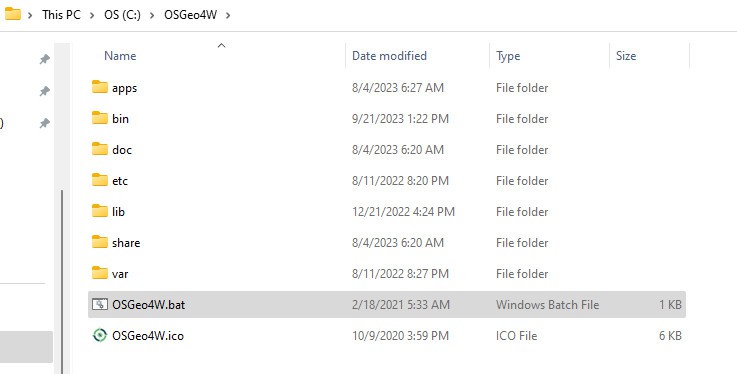
To find the terminal, navigate to your C: drive and look for a folder with a name similar to OSGeo4W. Open the folder. Inside you should find a file named OSGeo4W.bat. Double-click to open. This will open a command prompt. Type o-help to see a list of available commands. You should see some GDAL tools. Follow the directions a few sections down to check your GDAL installation.
You can also add the path of the GDAL tools (C:\OSGeo4W\bin) to your Windows Path variable to access it with powershell or the Windows command prompt.
Installing GDAL with QGIS
If you have QGIS installed, you may also have GDAL installed. Since one of the install options for QGIS is to use the OSGeo4W Network installer, you may have installed GDAL at the same time. To check, navigate to your C: drive folder listed in the directions above to see if it (and the GDAL installation) exists.
Install GDAL for Mac
Follow these steps to install GDAL on MacOS:
- Install HomeBrew (if not installed already). You can use this command:
/usr/bin/ruby -e "$(curl -fsSL https://raw.githubusercontent.com/Homebrew/install/master/install)" - Use HomeBrew to install GDAL:
brew install gdal - Upgrade
pip, the Python package manager:pip install --upgrade pip - Complete installation with
pip:pip install gdal
This will install GDAL for use from the terminal and in Python.
Follow the instructions below to check the installation.
Install GDAL for Linux
Follow these steps to install GDAL on Linux distributions:
- Add the ubuntugis ppa to your sources:
sudo add-apt-repository ppa:ubuntugis/ppa - Update source packages:
sudo apt-get update - Install GDAL:
sudo apt-get install gdal-bin - Install the GDAL development libraries:
sudo apt-get install libgdal-dev
If you want to also install GDAL for Python check out this article for more information.
Check Your GDAL Installation
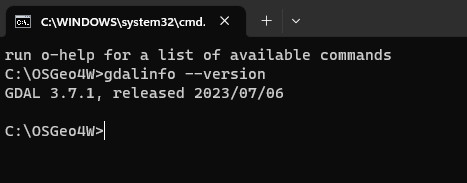
Once you have GDAL installed. Check your installation on the command line with gdalinfo --version.
If installed correctly, this will print out your GDAL version (see image below).
If you cannot run the command successfully, check out the troubleshooting section below for help.
Installation Methods for Any Operating System
There are a couple of easy GDAL installation methods that work for any operating system. They are linked to Python installations. If you install GDAL this way, you will just need a Python installation. Once installed you will be able to access GDAL from the command-line.
Anaconda/Miniconda/Conda
GDAL is very easy to install from conda’s conda-forge channel. I have a detailed article on how to do this.
Just activate your desired environment (or install it on the base environment) and run this code:
conda install -c conda-forge gdal
PIP
GDAL is also available with Python’s standard package manager, pip.
Mac and Linux users should be able to run pip install gdal.
It will be a little more difficult for Windows users. Once again, I have a detailed article that will walk you through the steps.
Troubleshooting GDAL Installation Problems
If the installation process completed successfully then GDAL was successfully installed on your machine. However, your system may always recognize that GDAL has been installed.
So, if you thought GDAL was installed, but you get an error when trying to verify your installation, this section should help you out.
The most likely problem is that you need to update the Path and/or GDAL_DATA environment variables so that your system knows where to find the program you just installed.
To do this you need to locate two directories. The “bin” and “data” directories.
The “bin” directory is the most important and contains the GDAL/OGR tools.
Once you’ve located the “bin” directory (it should be in a location like this: gdal-installation-folder/bin), add it to the Path variable.
Locate the data directory (it may not exist for all installations) and add it to the GDAL_DATA variable (Note: you may need to create a new variable named GDAL_DATA).
Getting started with GDAL tools
There are many different command line tools that are part of the GDAL/OGR package. For a list of these tools, and how to use them check out the official GDAL documentation.
Many of the GDAL/OGR tools are also implemented in QGIS, this gives the tools a GUI and might make them easier for beginners to use.
Using GDAL with a User Interface (or Viewer)
Working with command-line (terminal) tools can be intimidating if you’re not used to it. GDAL does not have a user interface but is an easy way to use GDAL tools with a user interface.
GDAL is very well embedded into QGIS. And QGIS has an excellent user interface.
From QGIS you can use many (if not all) of the GDAL tools. In QGIS, most of the GDAL tools are found under the “Raster” option of the Main Menu. Here you can access the GDAL tools for raster creation, clipping, merging, transformation, projection, interpolation, and more.
GDAL tools are also accessible in the QGIS Processing Toolbox under the GDAL heading. Here the tools are organized into subcategories.
Note: To get the GDAL tools in QGIS you will need to use the OSGeo4W Network Installer to install both QGIS and GDAL.