PyQGIS: Buffer Geometries
Creating a buffer around features is a common spatial analysis task. This blog post demonstrates how to customize and automate buffer operations with Python in QGIS (PyQGIS).
Start by defining the name of the variable to buffer and specifying an output file path. For this example we will load a layer that is already in the QGIS Table of Contents. You can check out these blog posts the details on loading layers from a file and from the table of contents. We also define the distance for the buffer. Note that this distance is in map units. So if you are using a geographic coordinate system (i.e. units are degrees) like WGS84 or NAD83 be aware that you’ll probably want to use values less than 1.0.
layerName = 'input_layer_name'
outFile = 'path/to/buffer.shp'
bufDist = 50  # buffer width in map units
Next read the layer from the table of contents. Again, you can check out these blog posts the details on loading layers from a file and from the table of contents. The get the layer’s fields and features. We’ll copy the attributes (field values) directly to the buffer layer
layers = QgsProject.instance().mapLayersByName(layerName)
layer = layers[0]
fields = layer.fields()
feats = layer.getFeatures()
Now we’ll create a QgsVectorFileWriter that will add the buffered features to a new layer and save it. The parameters, in order, are the output file path, file encoding, fields for the new layer (QgsFields; in this case identical to the fields of the input layer), geometry type (QgsWkbTypes), coordinate reference system definition (QgsCoordinateReferenceSystem), and driver to create the file.
writer = QgsVectorFileWriter(outFile, 'UTF-8', fields, \
QgsWkbTypes.Polygon, layer.sourceCrs(), 'ESRI Shapefile')
Once the writer is created, loop through features in the input (source) layer. For each feature, read the geometry. Then use the buffer method to create the buffered geometry. buffer takes two arguments; the buffer distance (which we defined above) and the number of line segments used to make a quarter circle (here set to 5). Now set the feature’s geometry to the buffer geometry just created. The feat variable now contains all the attributes of the input layer, but has a different geometry (polygon instead of line, or point). Use writer to add the feature (addFeature) to the new (buffer) layer.
for feat in feats:
    geom = feat.geometry()
    buffer = geom.buffer(bufDist, 5)
    feat.setGeometry(buffer)
    writer.addFeature(feat)
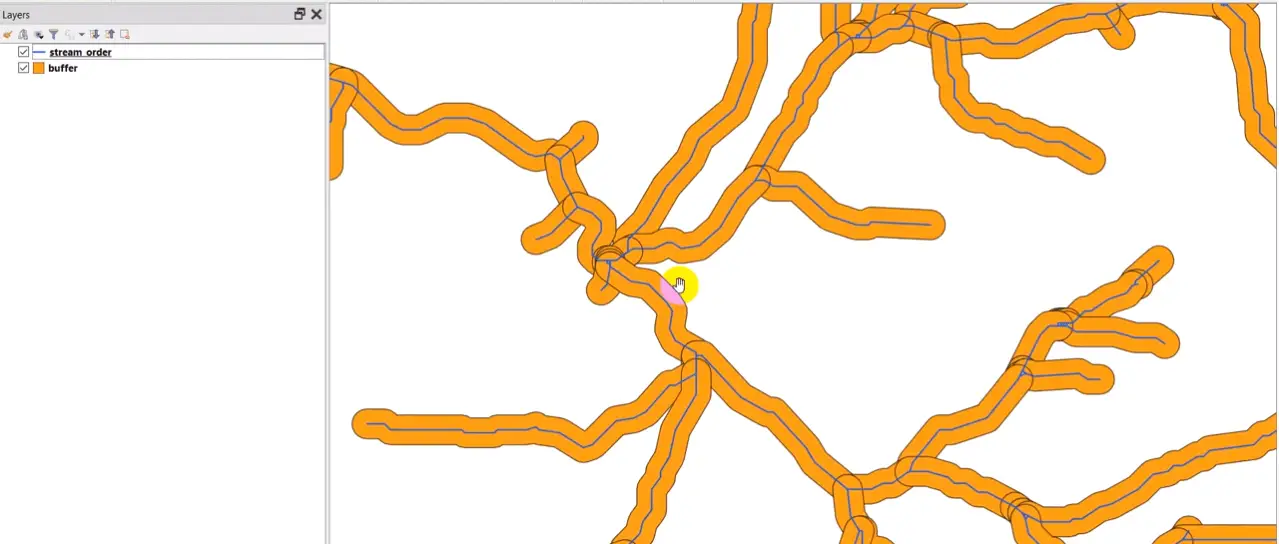
Finally, add the buffered layer to the QGIS interface and delete the writer.
iface.addVectorLayer(outFile, '', 'ogr')
del(writer)
The complete code block is below. Check out the video at the end for a step-by-step demonstration of the process.
layerName = 'input_layer_name'
outFile = 'path/to/buffer.shp'
bufDist = 50
layers = QgsProject.instance().mapLayersByName(layerName)
layer = layers[0]
fields = layer.fields()
feats = layer.getFeatures()

writer = QgsVectorFileWriter(outFile, 'UTF-8', fields, \
QgsWkbTypes.Polygon, layer.sourceCrs(), 'ESRI Shapefile')

for feat in feats:
    geom = feat.geometry()
    buffer = geom.buffer(bufDist, 5)
    feat.setGeometry(buffer)
    writer.addFeature(feat)
print('done')
iface.addVectorLayer(outFile, '', 'ogr')
del(writer)