The Easiest Way to Install Python on Windows 11 (also works for Mac and Linux)
Having trouble finding an easy way to install Python that always works? You’re in the right place. After years of trying different Python installation methods, I’ve come up with a method that will get you installing packages and running code in no time!
The hardest part of learning Python isn’t writing Python code. There are tons of tutorials that will teach you exactly what you need to know. The hardest part of learning Python is installing a Python interpreter and environments that work consistently.
What you need is a system that makes installing a Python interpreter easy. You also need a package manager to install packages, package dependencies, and resolve any dependency conflicts among packages.
Follow the steps in this tutorial and you’ll be running Python code in no time! I’ve worked through this tutorial using a Windows 11 machine. I’ve also used this method many times with Windows 10. All the software used here is cross-platform compatible so it should also work with Mac and Linux.
I also have a free course that will walk you through these steps and more with step-by-step video tutorials. It’s free to sign-up. Go give it a try.
Anaconda and Miniconda
Chances are that you’ve heard of Anaconda.
If you haven’t, here’s a quick description. Anaconda is what I call a ‘Python ecosystem software’ when you install Anaconda you get a Python distribution, package and environment manager (conda), and a bunch of commonly used packages.
The conda package/environment manager makes it so easy to manager everything with your Python environments and packages.
The only downside to Anaconda is that it’s bloaty. The installation is huge (~10 GB)!
This is where miniconda comes in. Miniconda gets you the Python distribution and conda environment/package manager, which is all you really need, without the bloat. It’s lightweight. Easy to install. And easy to use. Win, win win!
On to the first step, install miniconda.
1. Install Miniconda
- Search for ‘install miniconda’ to find the distribution page, or navigate directly to the distribution page.
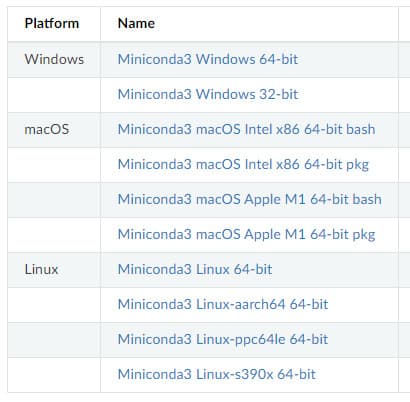
- From the list of options, select the one that matches your operating system and download the installer.
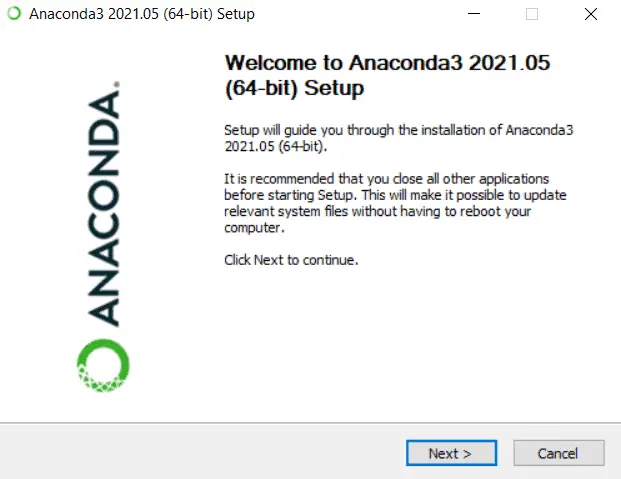
- Run the installer.
- Agree to the license terms.
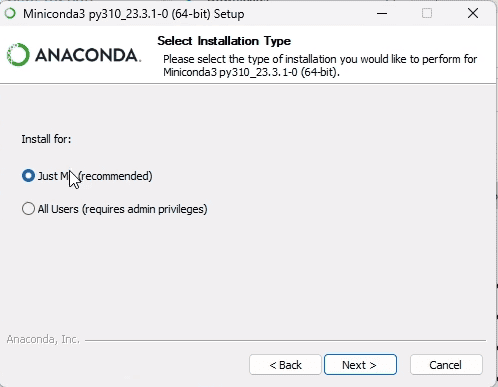
- Install for ‘Just Me’.
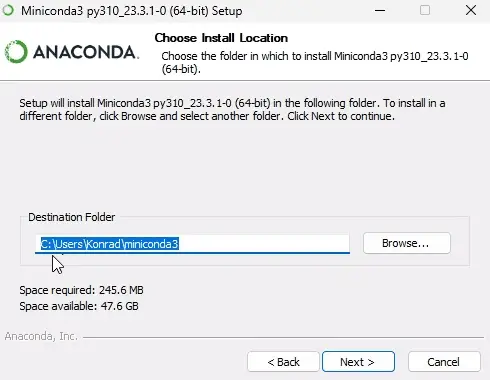
- Select the install folder. I recommend using the default folder, which should be C:\Users\your-user-name\miniconda3.
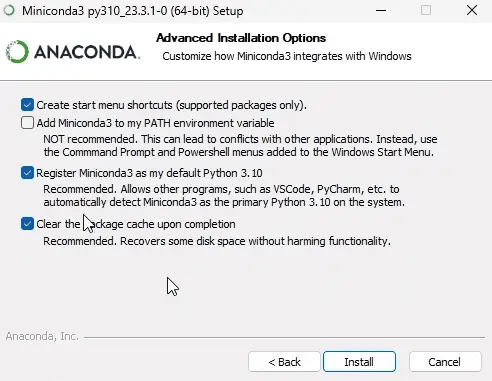
- Check all recommended settings (DO NOT check ‘Add Miniconda3 to my PATH environment variable’).
- Click ‘Install’ and wait for the installation to complete.
- Click ‘Finish’ (you can uncheck the options for Getting started and Welcome).
Now you have Python and a Python package and environment manager installed.
2. Open the Miniconda prompt
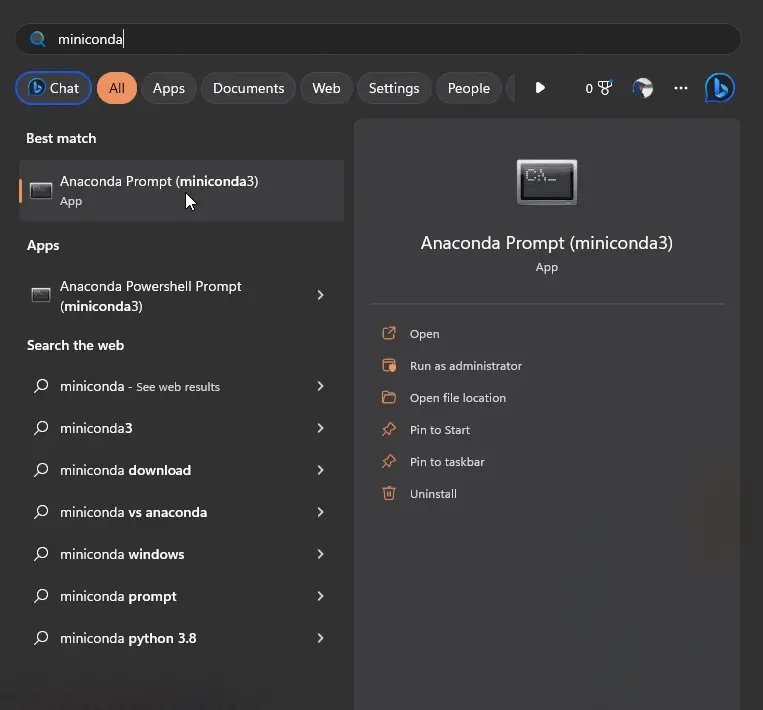
- Open the Windows Start Menu
- Start typing to search for ‘miniconda’ or ‘anaconda’. This should bring up a program that is something like ‘Anaconda Prompt (miniconda3)’. Click to open the program. This will open a command prompt
- Type
pythonand press Enter. You should see a message (like the one below) that describes the Python version you have installed, followed by this symbol:>>>. This indicates that you are in an ‘interactive Python session’. Anything you type will be interpreted as Python code using the Python environment specified in the message above.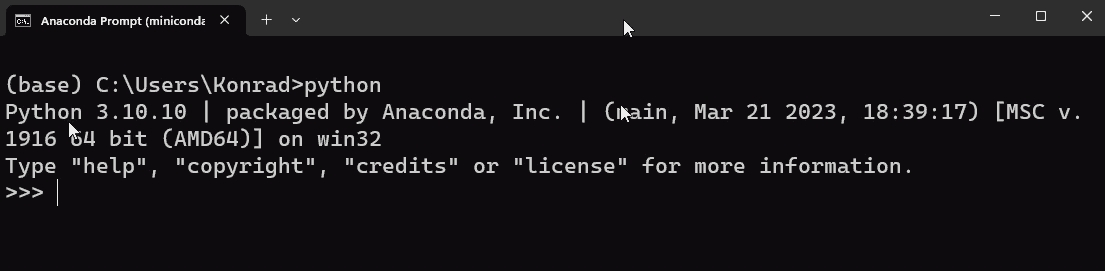
- Type
quit()to exit the interactive session.
Now you have verified your Python installation!
3. Set up a Python environment
With Python installed, you’re almost ready to start writing code! I just recommend that you start by creating a new Python environment first.
An environment will help you keep down the bloat of unused packages (and potential dependency issues) from project to project.
I know that creating an environment may seem daunting at first (it took me a long time to get comfortable using environments. Now I can’t live without them!), but it’s really easy once you get the hang of it.
I’ll briefly explain how to do this here. For detailed video instructions check out my FREE Python Quickstart Course.
To create a new environment, you just need to call conda create and specify the environment name and Python versions. Like this:
conda create --name myenv python=3.10
This code will create a new Python environment. To active the environment use conda activate followed by the environment name. Like this:
conda activate myenv
Now any packages you install will be installed for the active environment. Any code you run will be run with that environment.
It’s like having multiple Python versions that are project specific and have exactly what that project needs and nothing more. It’s awesome!
4. Install packages and write code!
Package installation is easy with conda just type conda install package-name. Your package, and its dependencies, will be installed.
The conda installer will automatically install the correct package versions to make sure everything is compatible and upgrade or downgrade any existing installations.
It’s that easy!
Most packages can be easily installed with that short code snippet. There are some more nuances about package versions and different conda package channels you may want to use. I cover those details in my free course.
Making your coding environment better
The command prompt isn’t the best place to develop Python code. For that, you’ll want to use an IDE (integrated development environment). I really like Visual Studio Code (AKA: Code or VSC) because it’s free and works with Windows, Mac, and Linux.
My FREE Python Quickstart course will walk you through VSC setup with Miniconda step-by-step. You can also check out this article to learn how to run code in VSC with Anaconda/Miniconda.
Don’t stop learning
Hopefully, this tutorial has helped you get a Python installation that will work consistently for you so that you can focus on writing code to do awesome things! It took me a long time to get to that point and my goal is to shorten the learning curve for you.
Now that you have Python installed, keep learning! Sharpen your skills! Do great things!