Merge Multiple Rasters in QGIS (Create a Raster Mosaic)
With GIS analysis it’s a common occurrence that multiple raster tiles are required to cover a study area. For many analyses, and specifically hydrological analyses, a seamless, single raster is needed. The solution for combining multiple raster layers is to perform a raster merge, also referred to as a raster mosaic. QGIS uses the the GDAL merge tool, which is a very fast and efficient tool, to merge multiple raster layers.
To merge raster layers in QGIS open the Merge tool from the raster menu, then select the raster layers to merge together, specify an output location and click run.
Follow the steps below for a detailed explanation of how to successfully complete a raster merge or mosaic.
Add Rasters to QGIS
The first step to merge multiple rasters is to load all your rasters into QGIS. Here I’ve added in three DEM tiles that I downloaded form the USGS National Map Viewer. Make sure that each raster has the same coordinate reference system as the others. If the rasters have different coordinate systems the merge will likely turn out incorrectly or cause and error during execution.

Run the Merge Tool
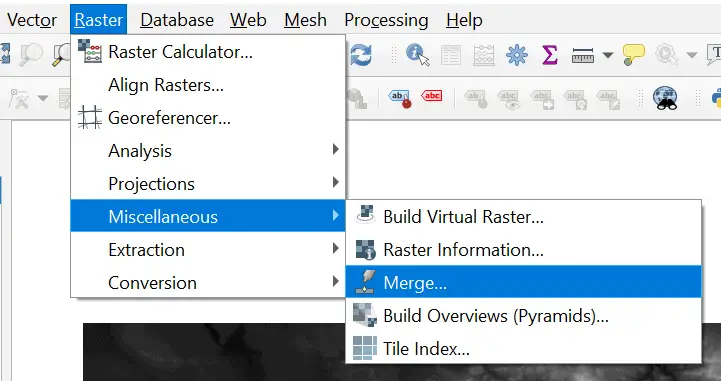
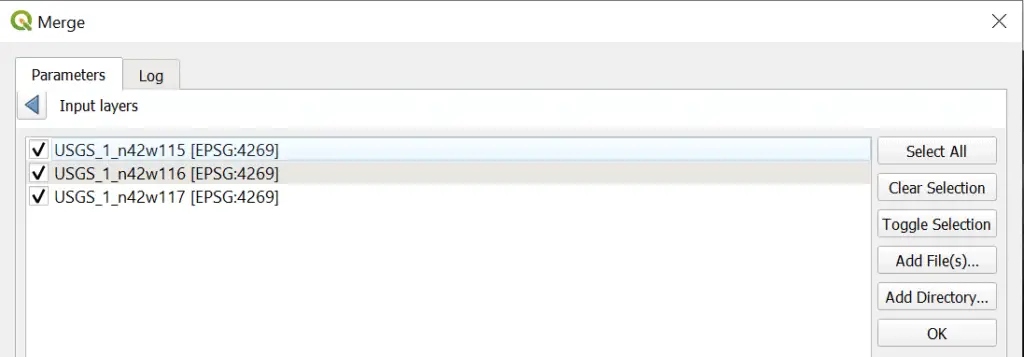
After the raster layers are added to QGIS open the merge tool. To access the merge tool select the Raster menu, then Miscellaneous, then Merge. Now click the ellipsis (three dots . . . ) next to the Input layers label to select the layers to merge. In the new window that opens, click the check box to select each raster layer you want to include in the merge. Here, I’ve selected all three of the raster layers I have loaded. Once the layers are selected, click OK to return to the main Merge tool interface. The images below show how to access the Merge tool and select the input raster layers.
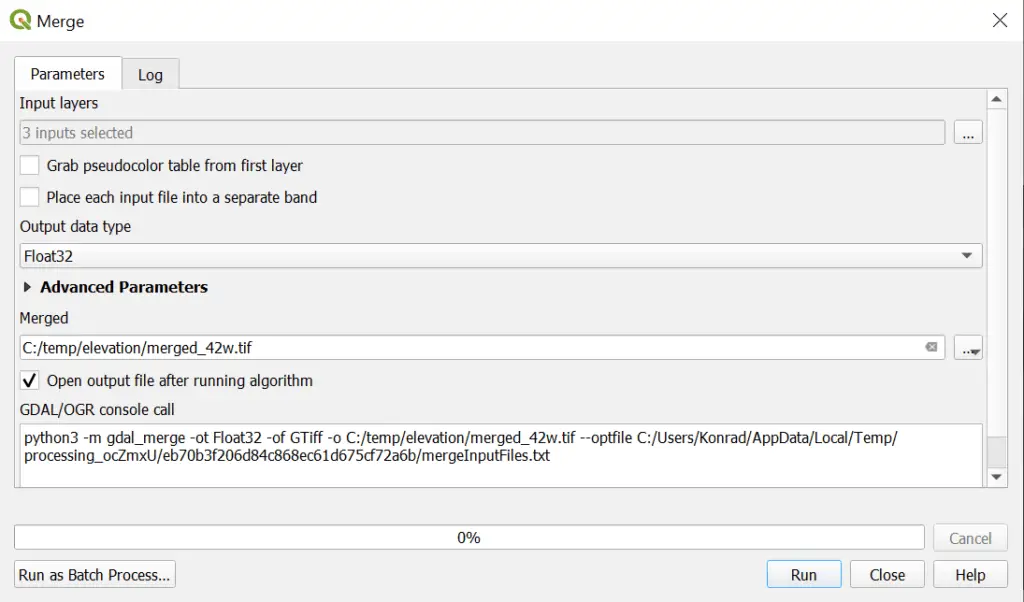
Selecting the proper data type is imperative to getting a proper merge but is often overlooked. If your raster layers contain whole numbers (no decimals) make sure the output data type is set to integer (or Int). If your raster layers have decimal values, set the output data type to Float. If you’re uncertain about which data type to select it’s probably safest to use Float.
Now select an output format. You can save the output as a temporary layer or save it to a file. If you’re going to use the result for future projects you’ll probably want to save it to a file. Now you’ve set everything you need to run the merge tool. Click run and wait for the tool to finish.
Note: the text in the box labeled GDAL/OGR console call can be copied and run from the Python console. If you’re interested in automating workflows, you can use the code below as a starting place.
Inspect Outputs
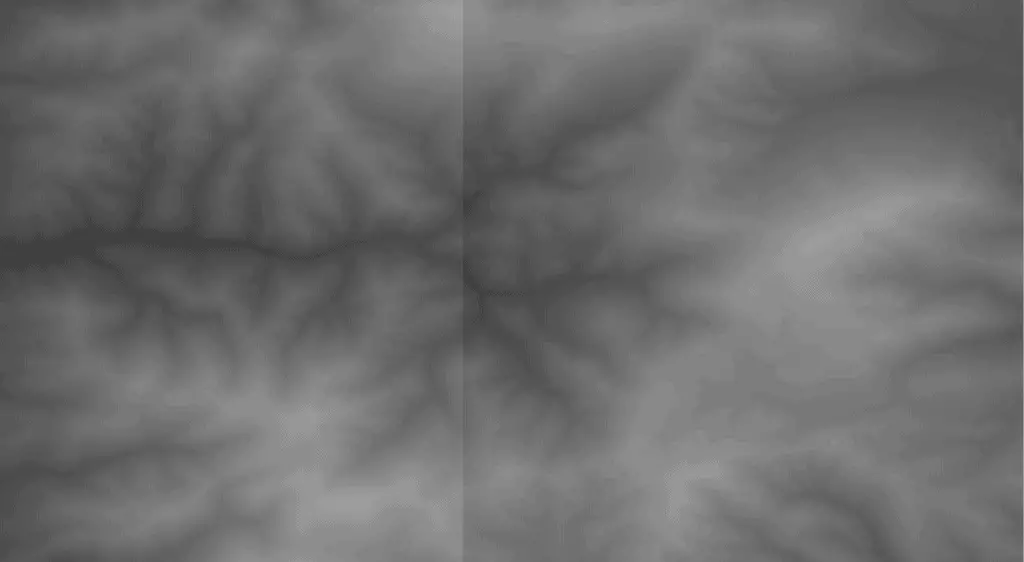
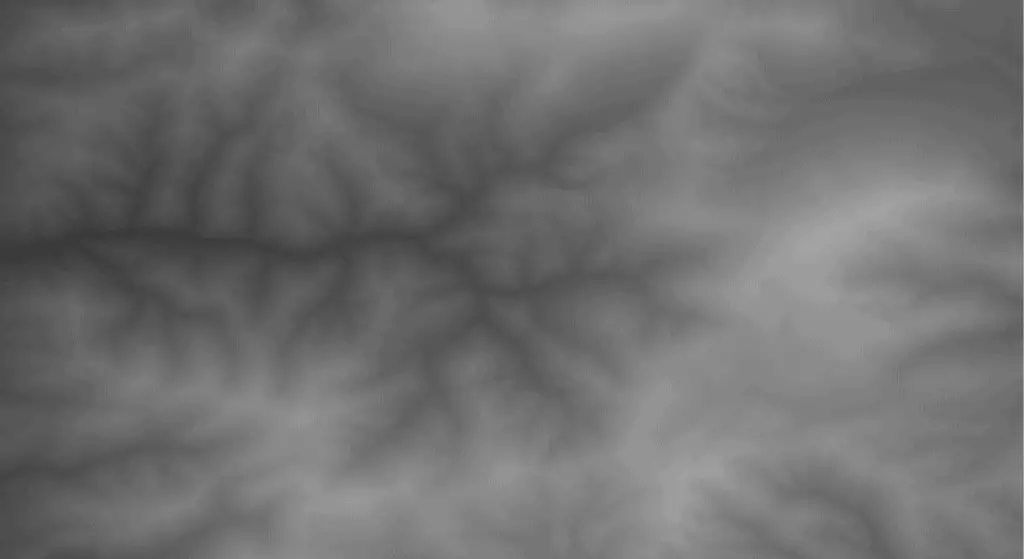
It’s always a good idea to check your outputs after the tool has completed. If you examine the seam where two raster layers meet you should see before and after images similar to the two below. In the left image you can see the seam where the two DEMs border each other. In the right image, after the merge is completed, the boundary should not be visible (in the merged layer).

Conclusion
As you now know, creating a merged, or mosaic, raster is a pretty easy task in QGIS. Even if you don’t need to merge for analysis, seamless, merged layers can make your maps look much nicer than individual tiles. Merging raster layers to create mosaics is something you will use countless times in your GIS analysis and data visualization.
