Make Public Web Maps with QGIS and Felt
Web maps are the best way to share data with an audience. They are also some of the most tedious and difficult map products to make.
Web maps give the creator control over which aspects of the data to share, how to display the data, and who to share the data with. They also make sharing easy. You don’t need to email large data files or field questions about the data behind a digital or paper map.
The problem with web maps is that they are difficult to create. You’ll definitely need a website, which can be a task by itself. Then, depending on the size of your data and your available resources, you may need a place to host your data. Then you’ll have to develop a map application and embed it in your website.
All that needs to be done after you’ve analyzed and created the data that are the focal point of the map. As you can see, this process requires many different skill sets, which makes it difficult for small operations (unless you’re using expensive software).
Felt makes this process so much easier. With Felt, you can share maps just like you would a Google Doc or Sheet. Just upload your data to a map, symbolize it however you want, and share a link or invite others to collaborate. And you can import your data directly from QGIS to Felt using the Add to Felt QGIS plugin.
This really is a huge deal for map sharing. And did I mention that Felt is free (or at least has a free tier)?
Felt makes it easy to share maps and data. This article will walk you through how to share your QGIS data directly to a Felt map using the Add to Felt QGIS Plugin.
1. Install the ‘Add to Felt’ plugin
To start, you’ll need to install the ‘Add to Felt’ plugin.
From the Main Menu select Plugins > Manage and Install Plugins. Search all plugins for ‘Add to Felt’. Then install the Add to Felt plugin.

Once the plugin is installed, access it from the Main Menu > Web > Felt.
The plugin has two options: ‘Sign In’ and ‘Add to Felt’.

2. Sign in to your Felt account (or create an account)
You’ll need to create a Felt account or sign in to an existing account before you can create maps or add data to maps. Clicking the Sign In option in the Add to Felt plugin will walk you through this process.
Once your account is linked you’re ready to add maps to Felt.
3. Add your data to a Felt map from QGIS
Make sure you’ve added some data layers in QGIS. The QGIS symbology won’t transfer to Felt, so don’t worry about making your data look pretty.
All the data layers in your QGIS map view will be added to Felt, so only add the layers that you want to export.
Once you have added the layers you want to export to Felt, select the ‘Add to Felt’ option from the Felt plugin.
You’ll see a window like the one below. Here you will select a map to add layers to, or choose to add the layers to a new map.
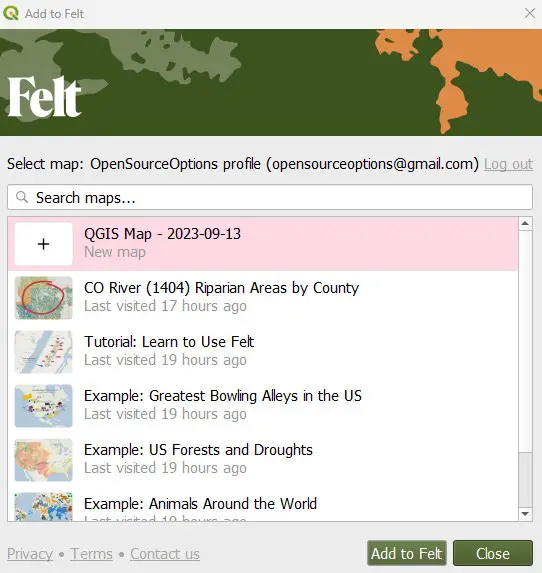
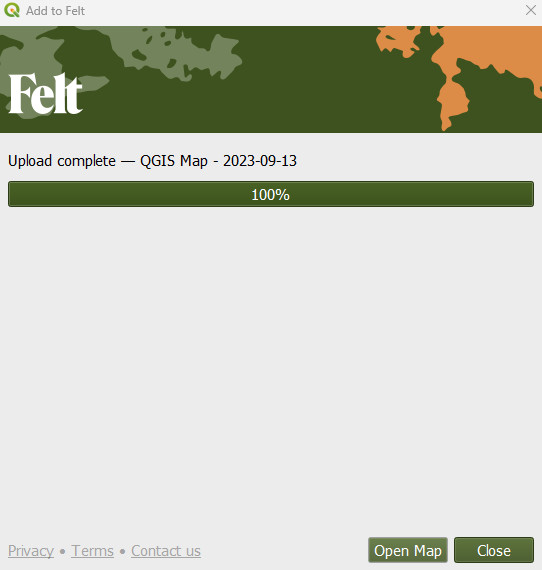
Once you have made your map selection click the ‘Add to Felt’ button. This will upload your data to the map you selected. Once the upload is complete click ‘Open Map’ to open the Felt map in your browser.
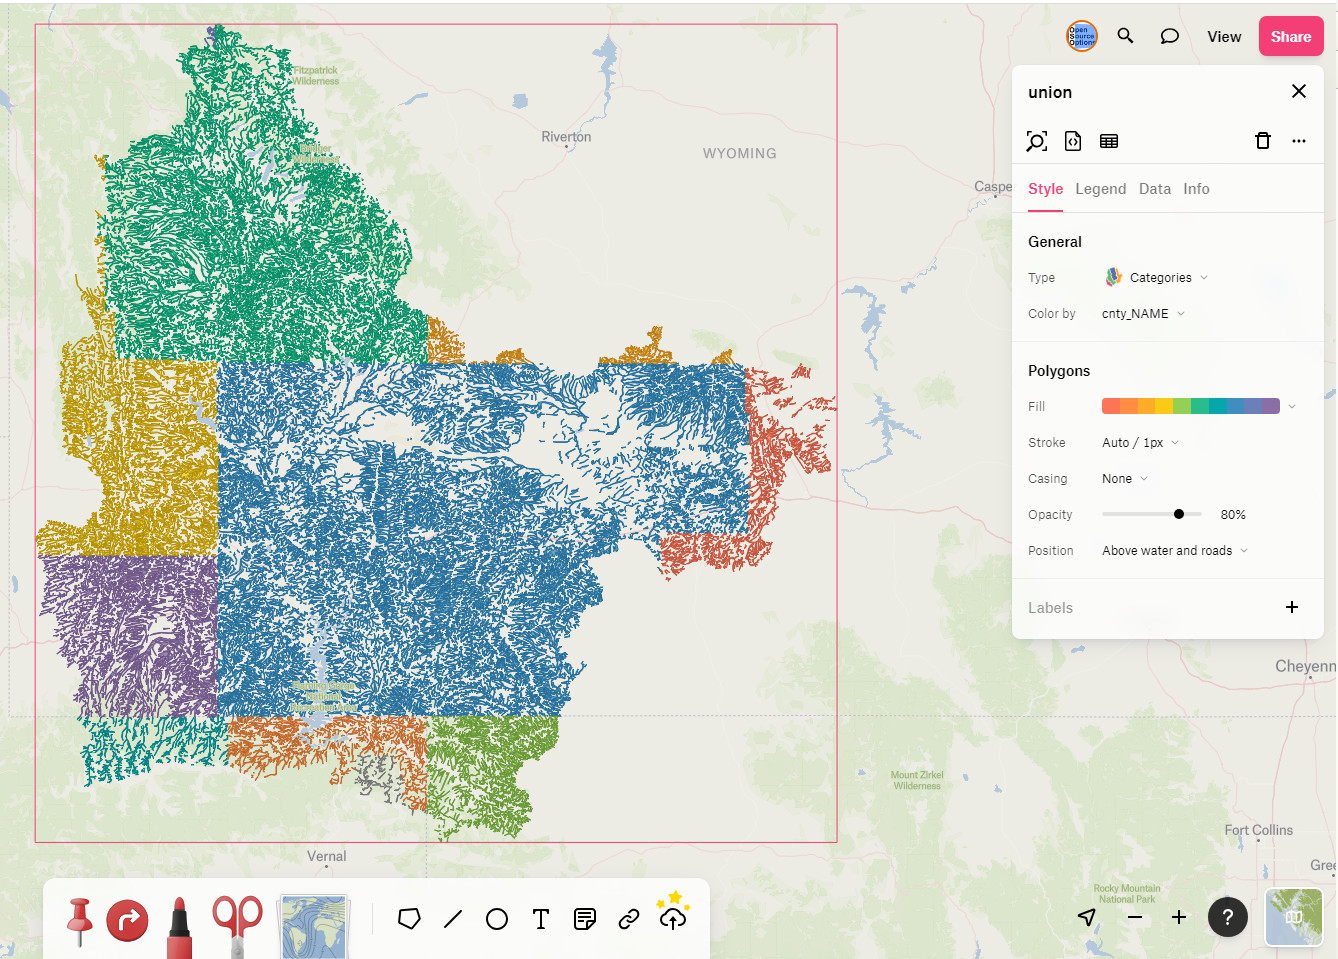
4. Symbolize your data in Felt
It may take a few minutes for the uploaded data to process. Once processing has completed, you can change visualization for your data layers and add more data and context. All these changes will be saved to Felt.

5. Share your map
Now share your map! Felt has many options for map sharing including publishing a public link, inviting collaborators, or exporting to an image or PDF.
Some potential downsides
So far, I’ve given Felt a pretty good review in this post, but there are some things you may want to watch out for. First, Felt is not open source. It’s not free. There is a free tier, but if you rely on Felt for sharing maps you’ll probably have to pay at some point.
Sure, it’s probably a lot cheaper and easier to use than other options out there. And it’s fair they’re asking for payment given everything that is required to serve maps online. Just be aware that with lots of use it won’t be free forever.