How to Install or Update QGIS
QGIS is an amazingly powerful, free GIS software. In my opinion, it’s the best free GIS software there is and even outperforms expensive, enterprise software in some instances (looking at you ESRI). QGIS is available for Windows, Mac, and Linux operating systems.
There are two different options for installing QGIS and the installation process can be a little different if you’re installing for the first time or updating to a newer version. Using the workflow to update QGIS can save you time so that you’re only installing the new software components. The installation and update processes are simple. I’ll walk you through each one below.
Download the Installer
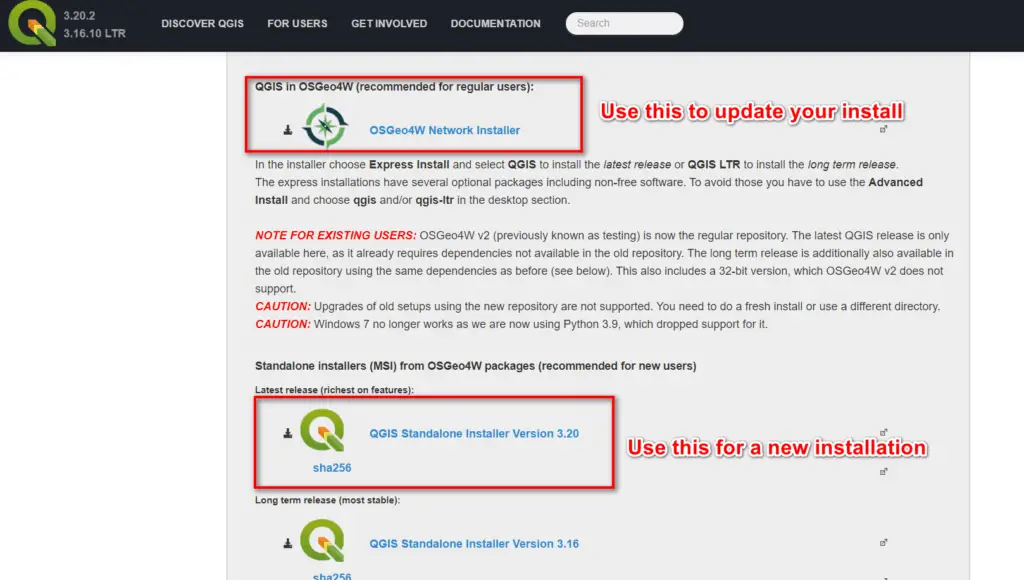
Go to qgis.org and navigate to the downloads page. On the QGIS downloads page, you will see a few different installer options.
For new users (or users that don’t already have QGIS installed on their machine) the best option is the QGIS standalone installer (see image below). You can choose the latest release, which will be the most up-to-date and have the most features, or the long-term release, which is more stable but will have fewer features.
If you already have QGIS installed and are updating to a newer version you will want to use the OSGeo4W Network Installer (see image below). The network installer can also be used for a new installation.
The installation process is a little different using the standalone installer (for new installs) and the network installer (for updating an existing install) so I’ll walk through the process for each.
Installing QGIS with the Standalone Installer
- Download the standalone installer for your desired QGIS version. The installation file is quite large so it will probably take a little while to download.
- Run the installation program once it has completed downloading.
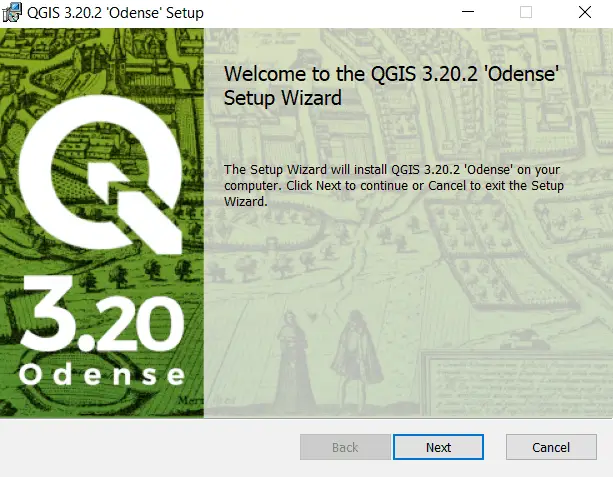
- The installer will open to a welcome message, click ‘Next’.
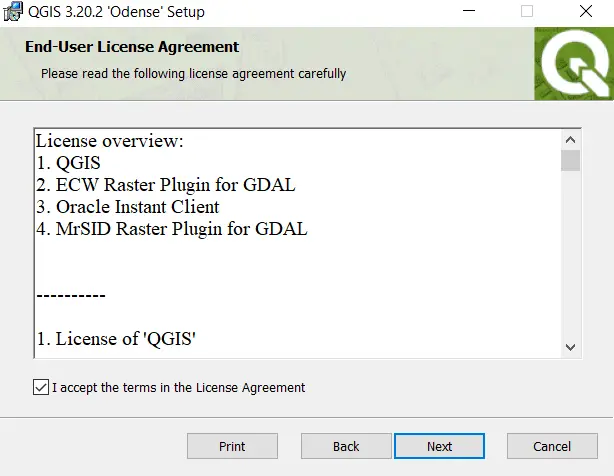
- Read and agree to the license terms and click ‘Next’.
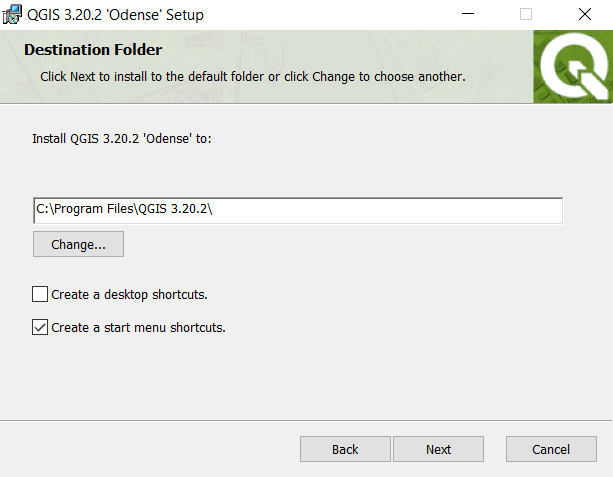
- Choose the installation location and shortcut options, then click ‘Next’.
- Click ‘Install’ and the installation will proceed to completion.

- Once the installation is complete you can open QGIS and begin working!
Update or Install QGIS with the OSGeo4W Network Installer
- Download the QGIS OSGeo4W Network Installer.
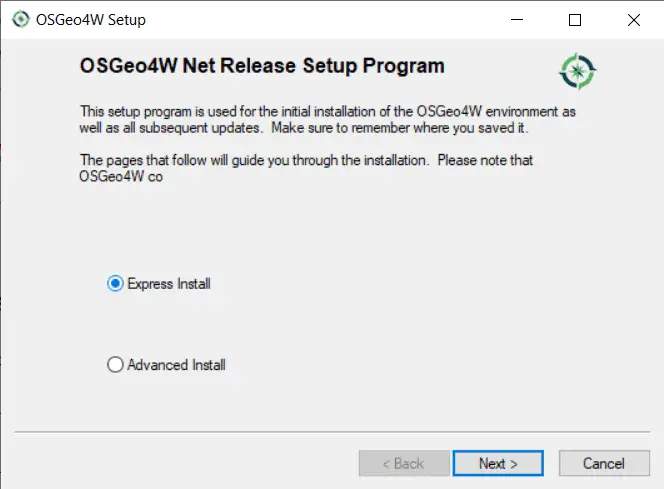
- Double-click the downloaded installer to run the install program.
- Select ‘Express Install’ and click ‘Next’.
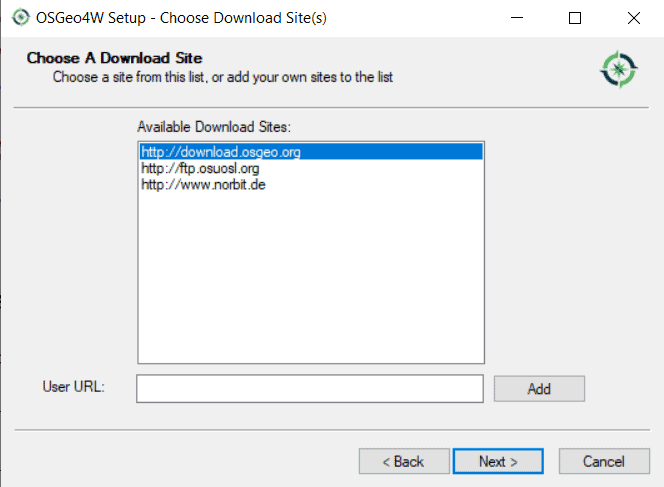
- Select a URL to download from and click ‘Next’. Any URL will work. I usually select http://download.osgeo.org.
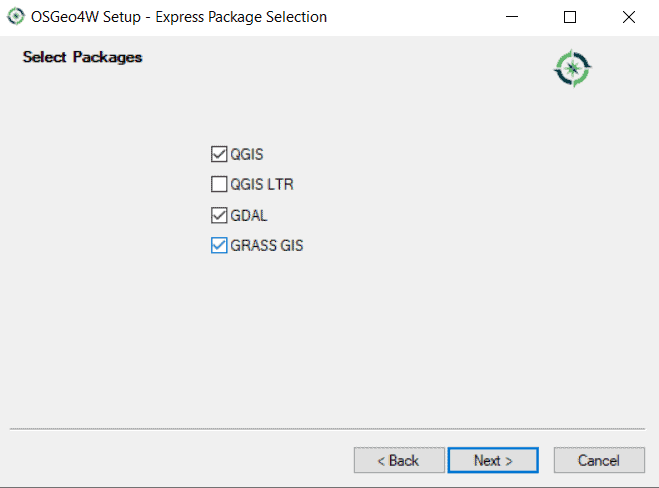
- Select the QGIS packages to install. At a minimum you should select QGIS or QGIS LTR. Click ‘Next’.
- When prompted, read and agree to the license terms for the different packages. After you agree to all the licensing the installation will begin. The installation will take quite awhile to complete. The more packages you select, the longer it takes. Installation time will partially depend on your internet connection.

- Click ‘Finish’ when the installation is complete.
- Once the installation is complete, QGIS will be updated to the latest version. You can now open and use QGIS.
Conclusion
The QGIS installers and install process change slightly over time. These instructions are generally correct for QGIS installations and updates but some details may be slightly different for future QGIS versions. I’ll try to keep this article updated with the most recent information.